basic DALI installation – multiple groups and scenes
Project scope
- Meeting room with up to 8+ luminaires and 3 groups and 3 scenes
- Manual control
with wall plate – Touchpanel
with tablet (Bluetooth)
Featured topics
- Planning DALI light installation
- Required DALI devices
- Setup and configuration with DALI Cockpit Software


Planning DALI light installation


Initial installation
- Meeting room with 1 table and 1 screen
- 8+ luminaires
DALI light management
- devision in 3 groups:
group 1 “screen”
group 2 “meeting table front”
group 3 “meeting table back” - Manual control with DALI Touchpanel: 6 buttons and DALI Touch application for tablet
Required DALI devices


1x
Art.Nr.:24033444 DALI PS DinRail
-> go to product page
DALI power supply with 230mA, DIN rail version mounted in switch cabinet
1x
Art.Nr.:24035465 DALI Touchpanel
-> go to product page
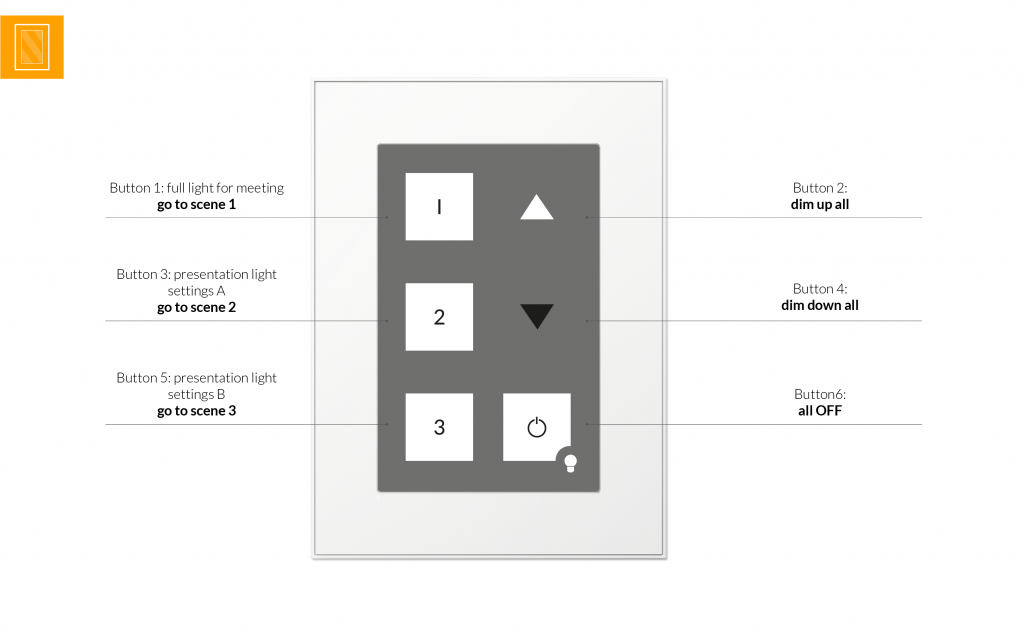
DALI Touchpanel with 6 buttons:
Button 1: full light for meeting – go to scene 1
Button 2: dim up all
Button 3: presentation light settings A – go to scene 2
Button 4: dim down all
Button 5: presentation light settings B – go to scene 3
Button 6: all Off


Required for setup and configuration


Setup and configuration with DALI Cockpit Software
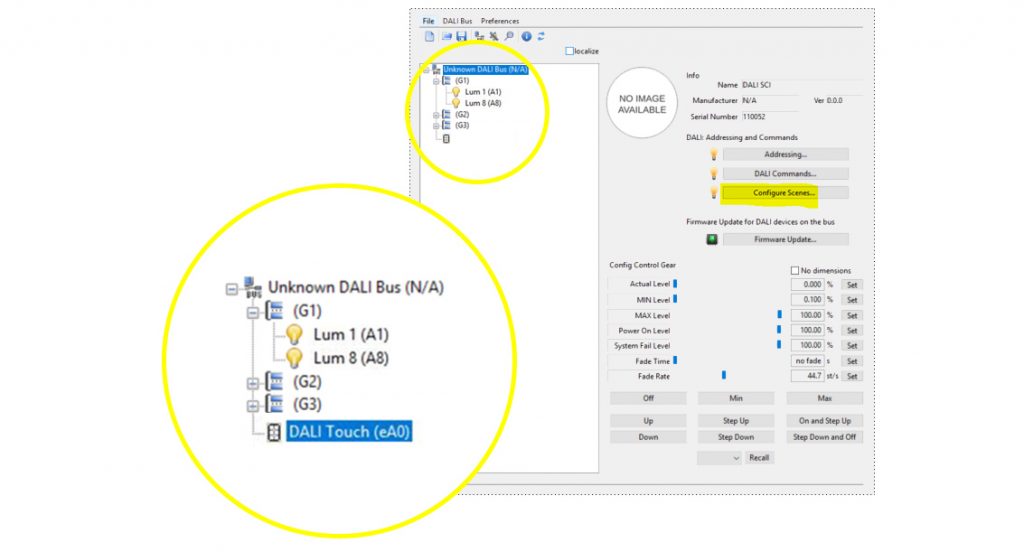
Step 1: General
- Connect DALI USB to the DALI Line and PC and start the DALI Cockpit Software
- Name components and create DALI Groups
Create groups:
- group 1 “screen”: 2 Luminaires
- group 2 “meeting table front”: 2 Luminaires
- group 3 “meeting table back”: 4 Luminaires
Define Scenes:
Quickest way to do is to use “configure scenes”
- Scene 1: group 1 / 2 / 3 = 100%
- Scene 2: group 1= 30%; group 2= 100% ; group 2= 100%
- Scene 3: group 1= 30%; group 2= 40% ; group 2= 100%
Step 2: DALI Touchpanel BT
Setting up buttons in DALI Cockpit:
Button 1:
Destination address: broadcast
Function: BF1
Cmd X (ON Cmd): go to scene 1
Button 3:
Destination address: broadcast
Function: BF1
Cmd X (ON Cmd): go to scene 2
Button 5:
Destination address: broadcast
Function: BF1
Cmd X (ON Cmd): go to scene 3
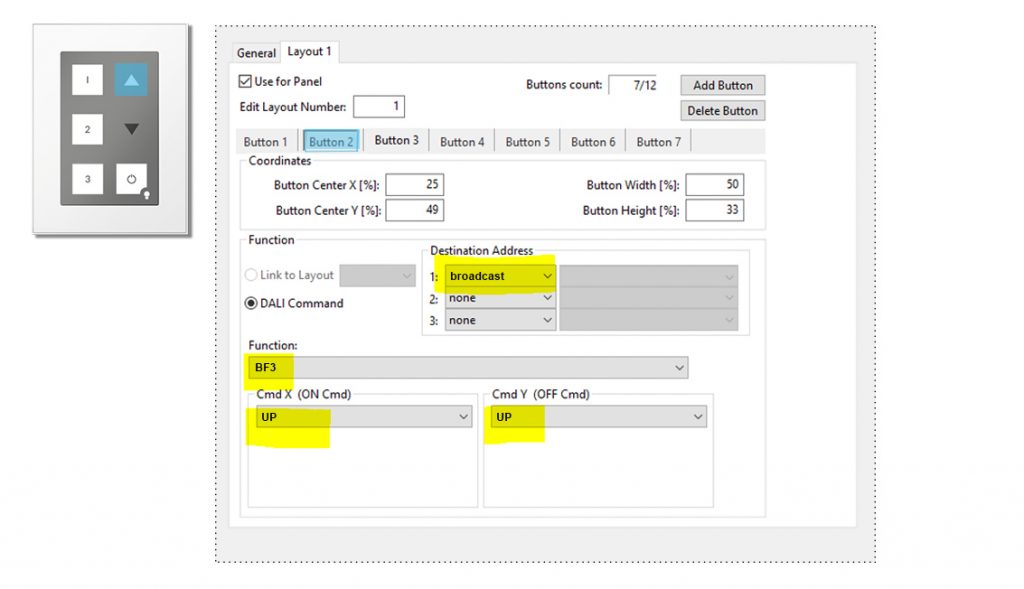
Button 2 (image):
Destination address: broadcast
Function: BF3
Cmd X (ON Cmd): UP
Cmd Y (OFF Cmd): UP
Button 4:
Destination address: broadcast
Function: BF3
Cmd X (ON Cmd): DOWN
Cmd Y (OFF Cmd): DOWN
Button 6:
Destination address: broadcast
Function: BF1
Cmd X (ON Cmd): OFF
Step 3: DALI Touch App
Load app on e.g. ipad
Connect to Touchpanel Bluetooth.

Downloads