advanced DALI installation – multiple groups, sensors and circadian light control
Project scope
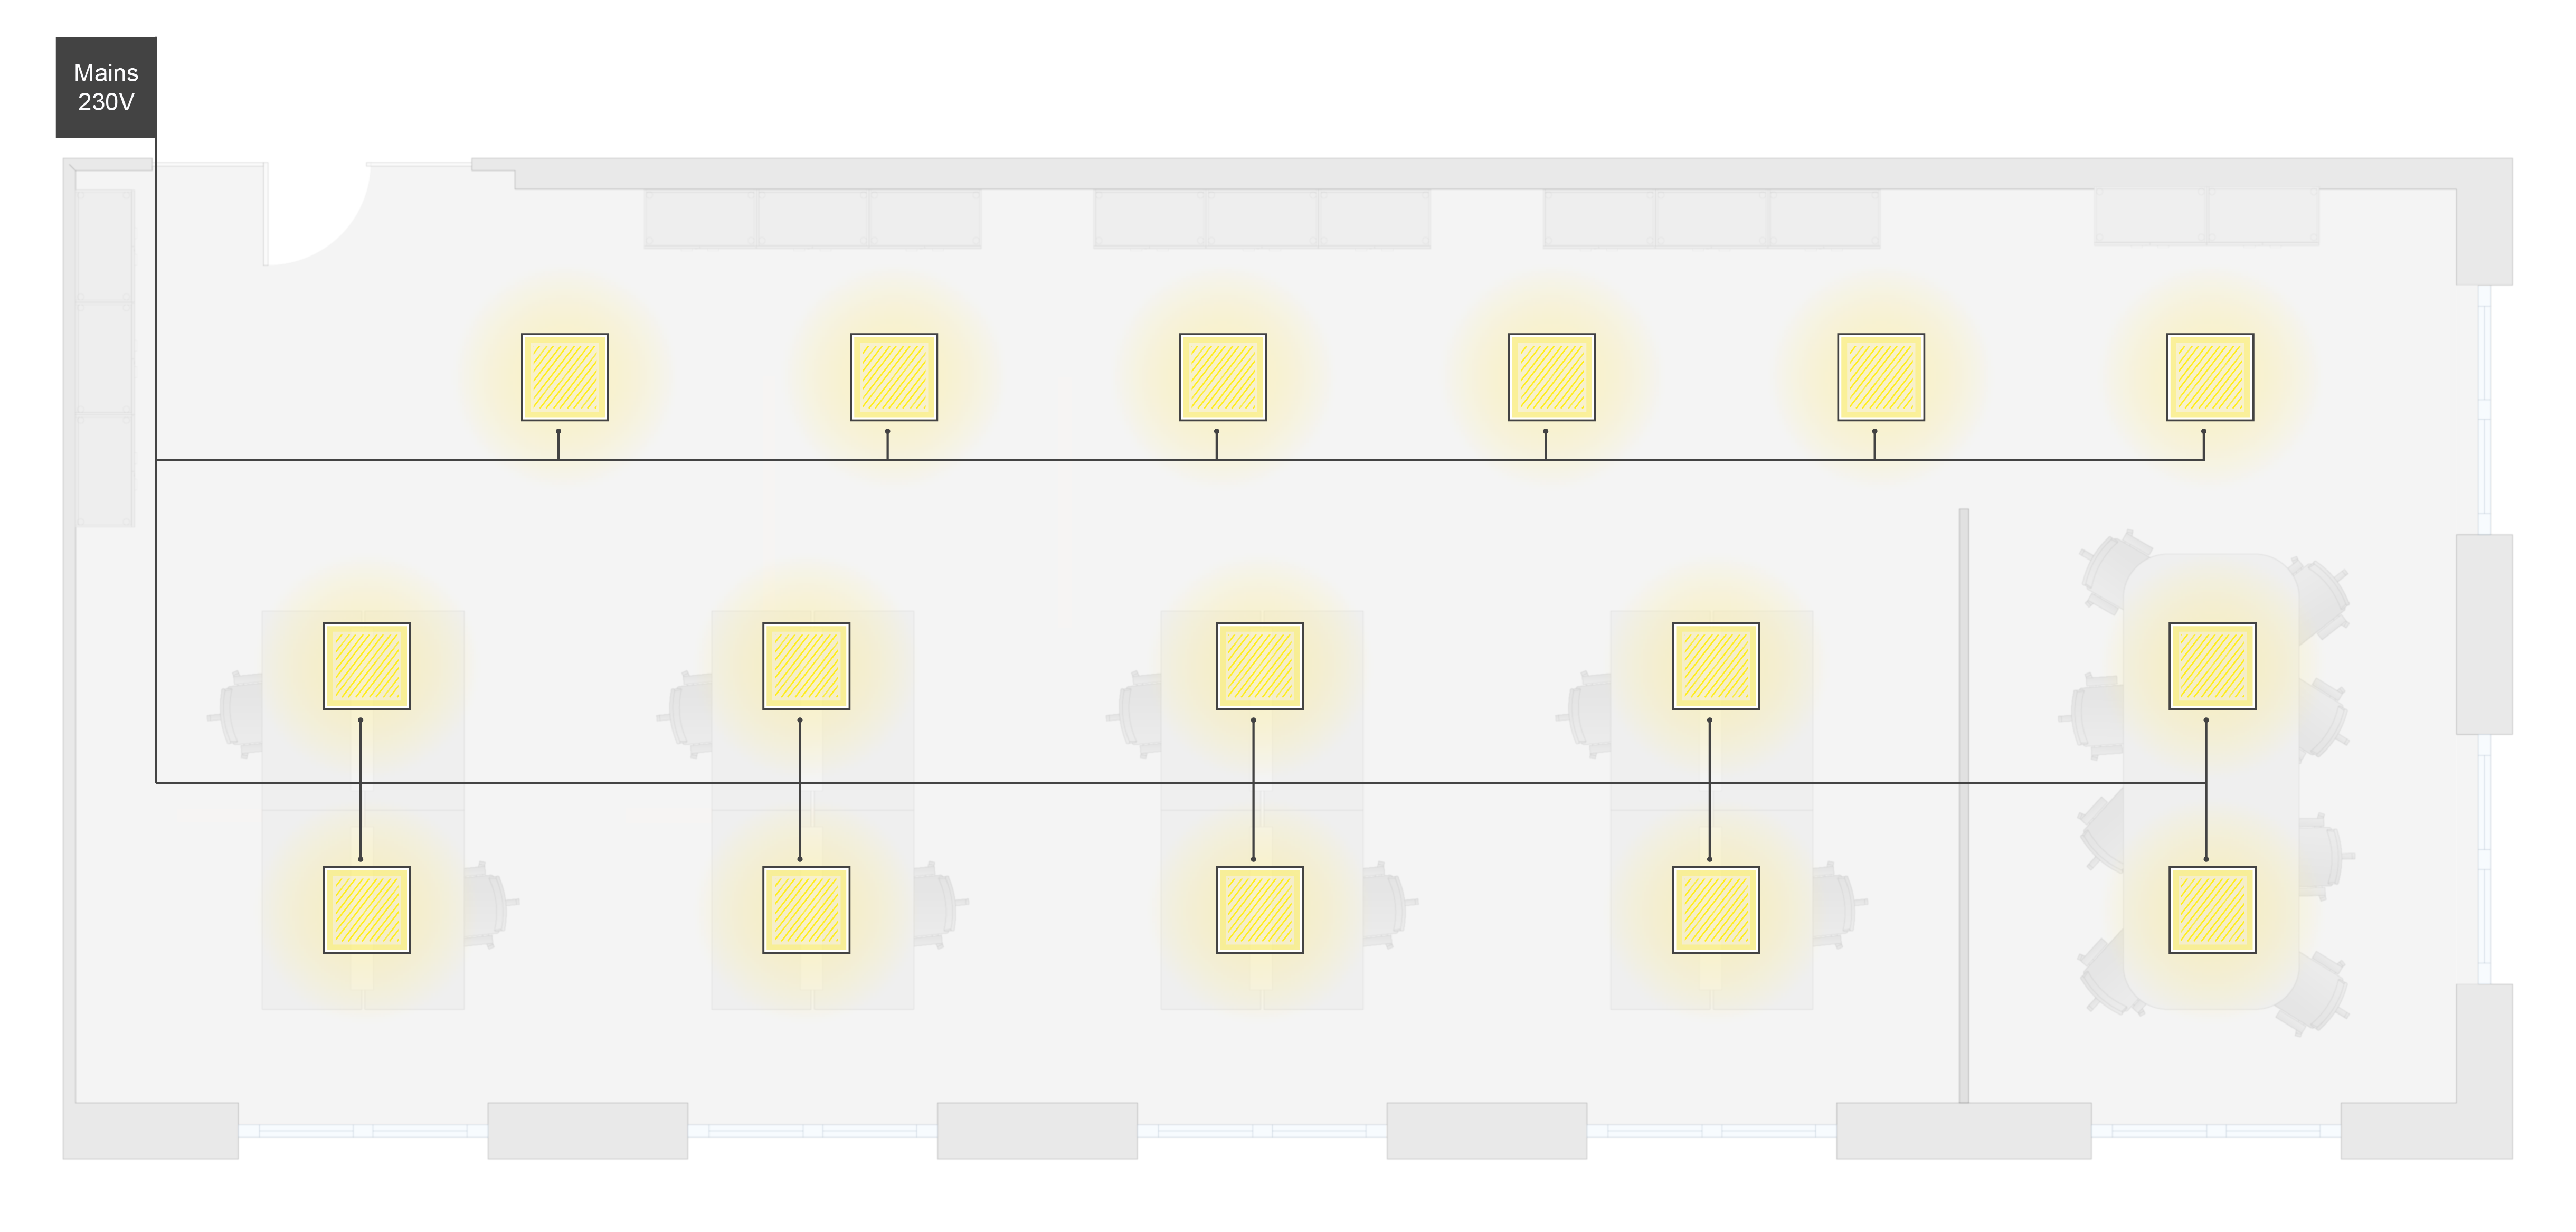
- Open-plan office with up to 16+ luminaires and 6 groups
10 – 64 luminaires / tunable white DALI DT8 - Sensor for movement / presence
Each work place/corridor/meeting space is regulated individually
Light turns on when movement / presence is detected and turns off after 10 mins of absence - Sensor for constant light control (energy saving)
light control depending on the brightness inside a room - Circadian daylight curve
from 2800K – 5000K – 2800K - Manual control
central control of all work spaces together / table / corridor
fixed values colour temperature: 2800K / 4500K / automatic
Featured topics
- Planning DALI light installation
- Required DALI devices
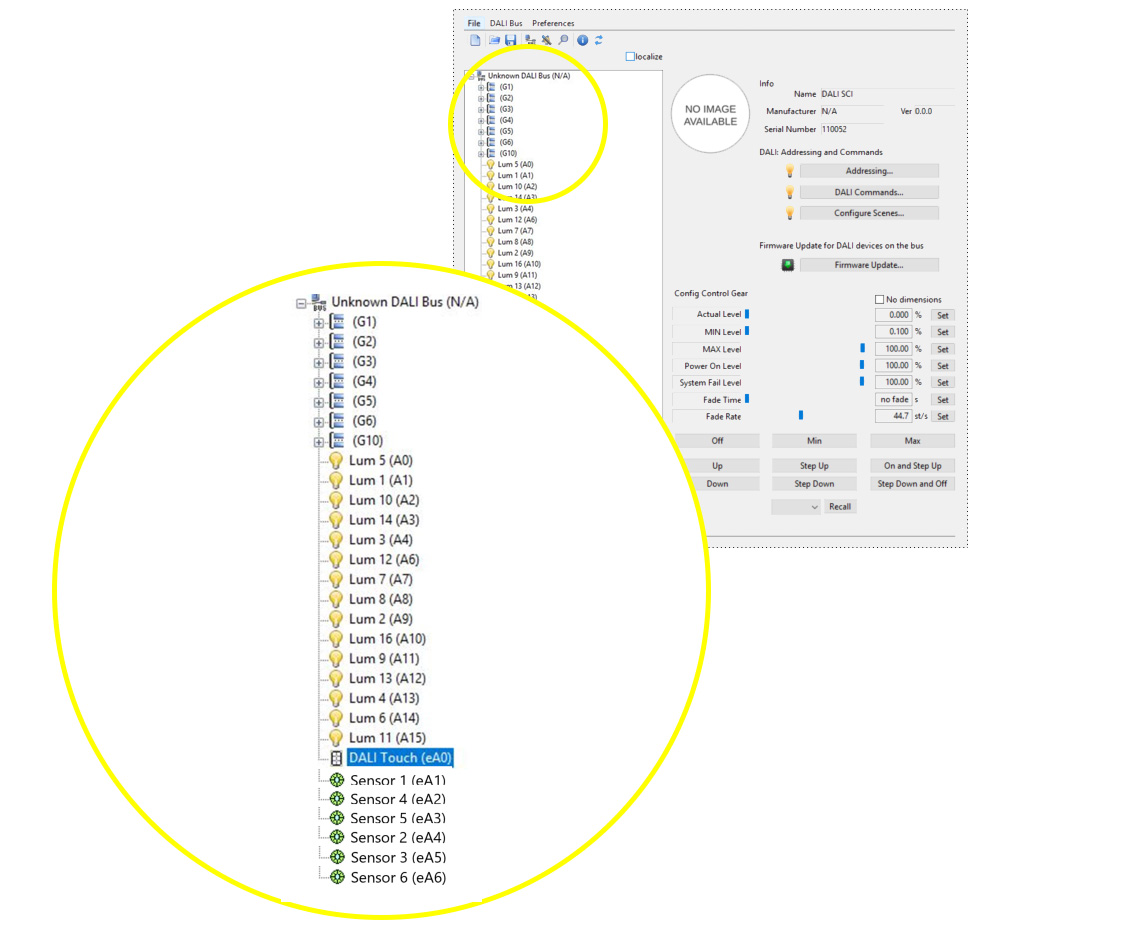
- Setup and configuration with DALI Cockpit Software

Planning DALI light installation
Initial installation
- Open-plan office with 8 work space, corridor and meeting table
- 16+ luminaires
- Manual control
DALI light management
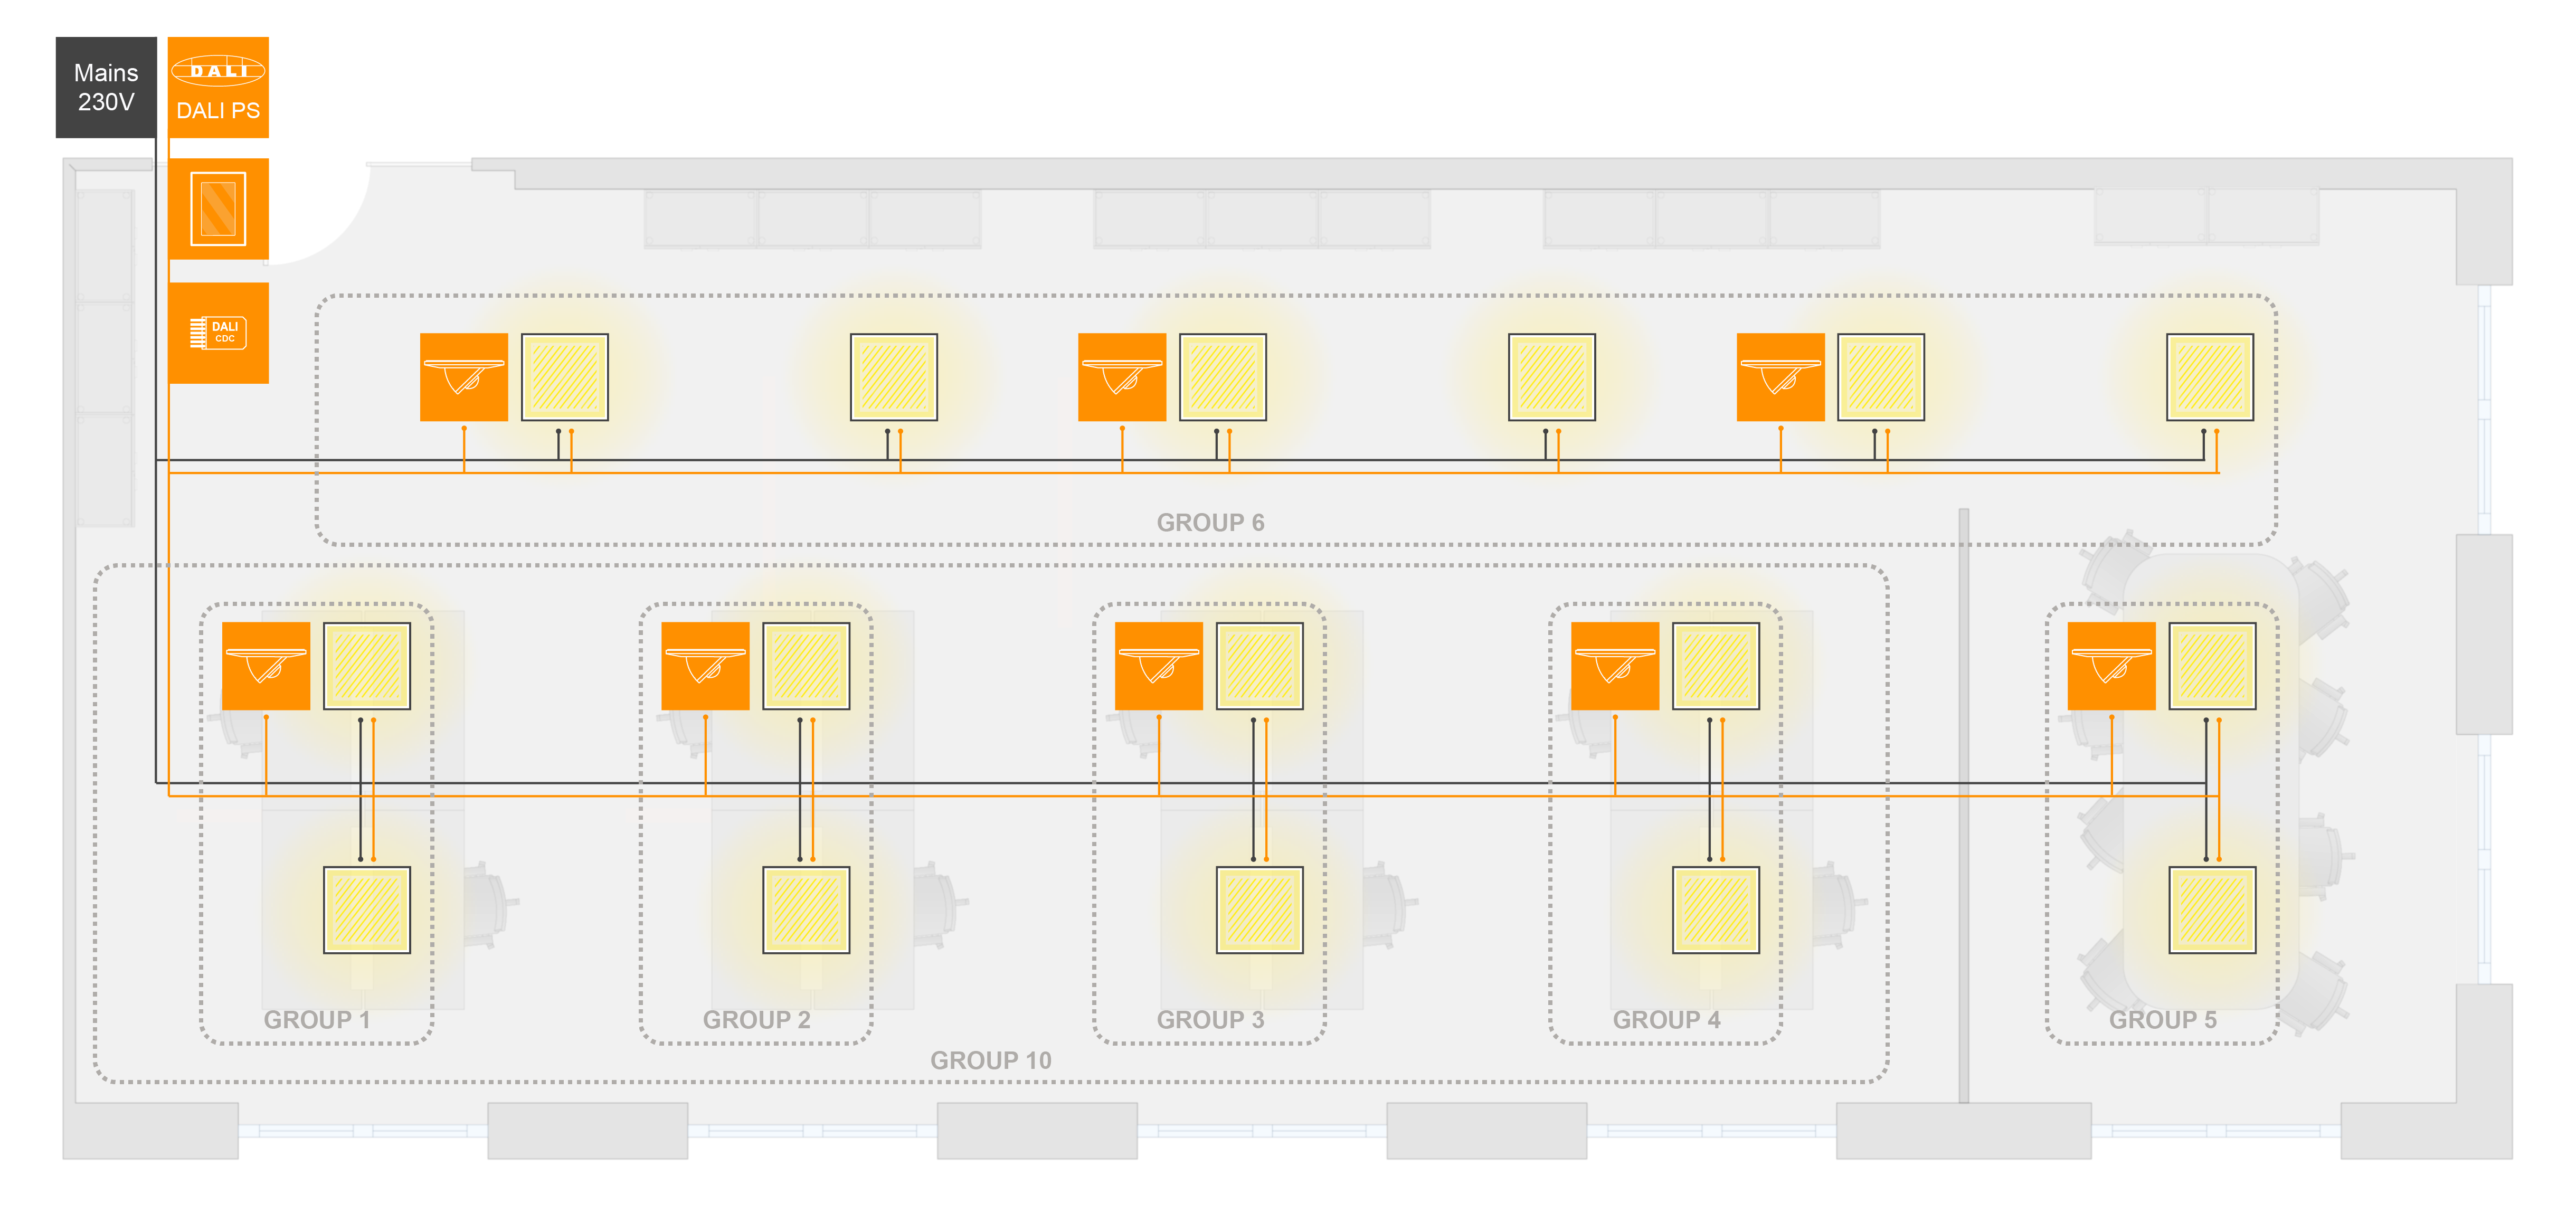
- devision in 6 groups (8 work places, corridor and meeting table) + 1 combination group to control all work spaces together (group 1 & group 2 & group 3 & group 4 => group 10)
- Movement / Presence sensor and constant light control for work space, corridor and meeting table
- Manual control with DALI Touchpanel: 6 buttons
- Circadian daylight curve from 2800K – 5000K – 2800K
Required DALI devices


1x
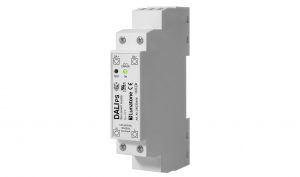
Art.Nr.:24033444 DALI PS DinRail
-> go to product page
DALI power supply with 230mA, DIN rail version mounted in switch cabinet
1x
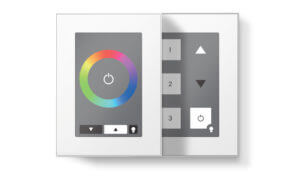
Art.Nr.:24035465 DALI Touchpanel
-> go to product page
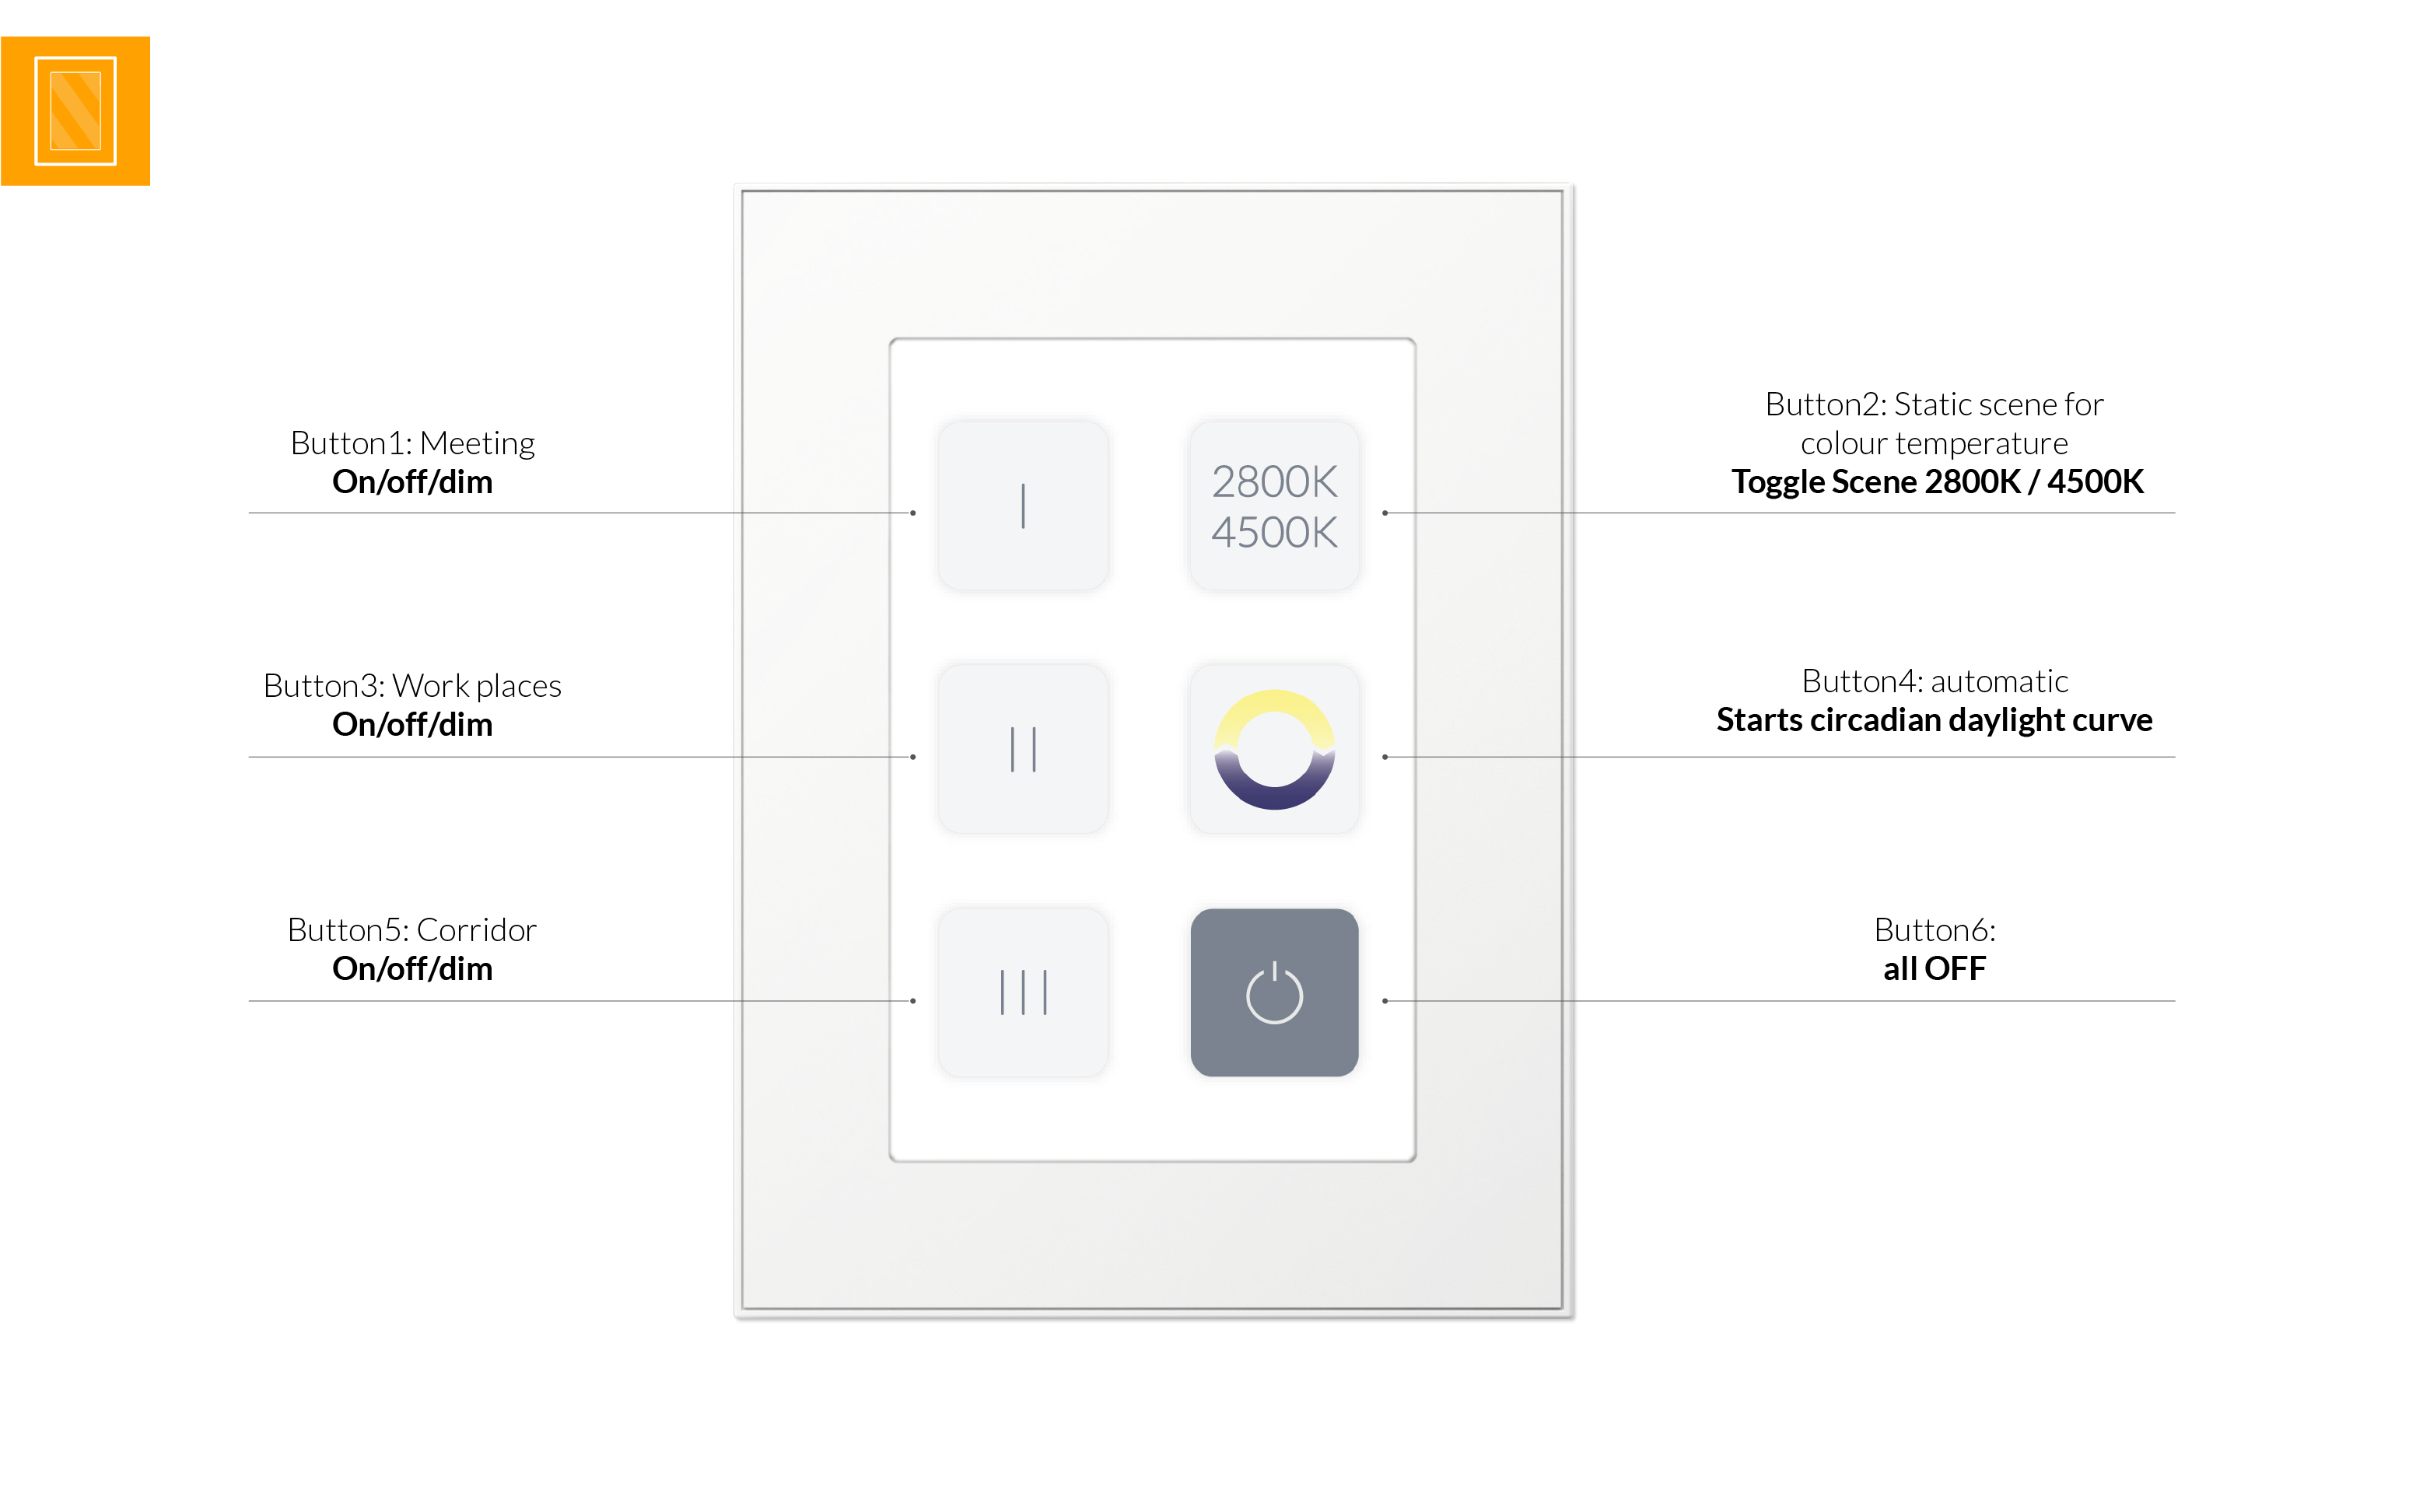
DALI Touchpanel with 6 buttons:
Button 1: on/off/dim meeting table
Button 2: toggle Scene 2800K / 4500K
Button 3: on/off/dim work places
Button 4: circadian automatic
Button 5: on/off/dim corridor
Button 6: all Off
8x
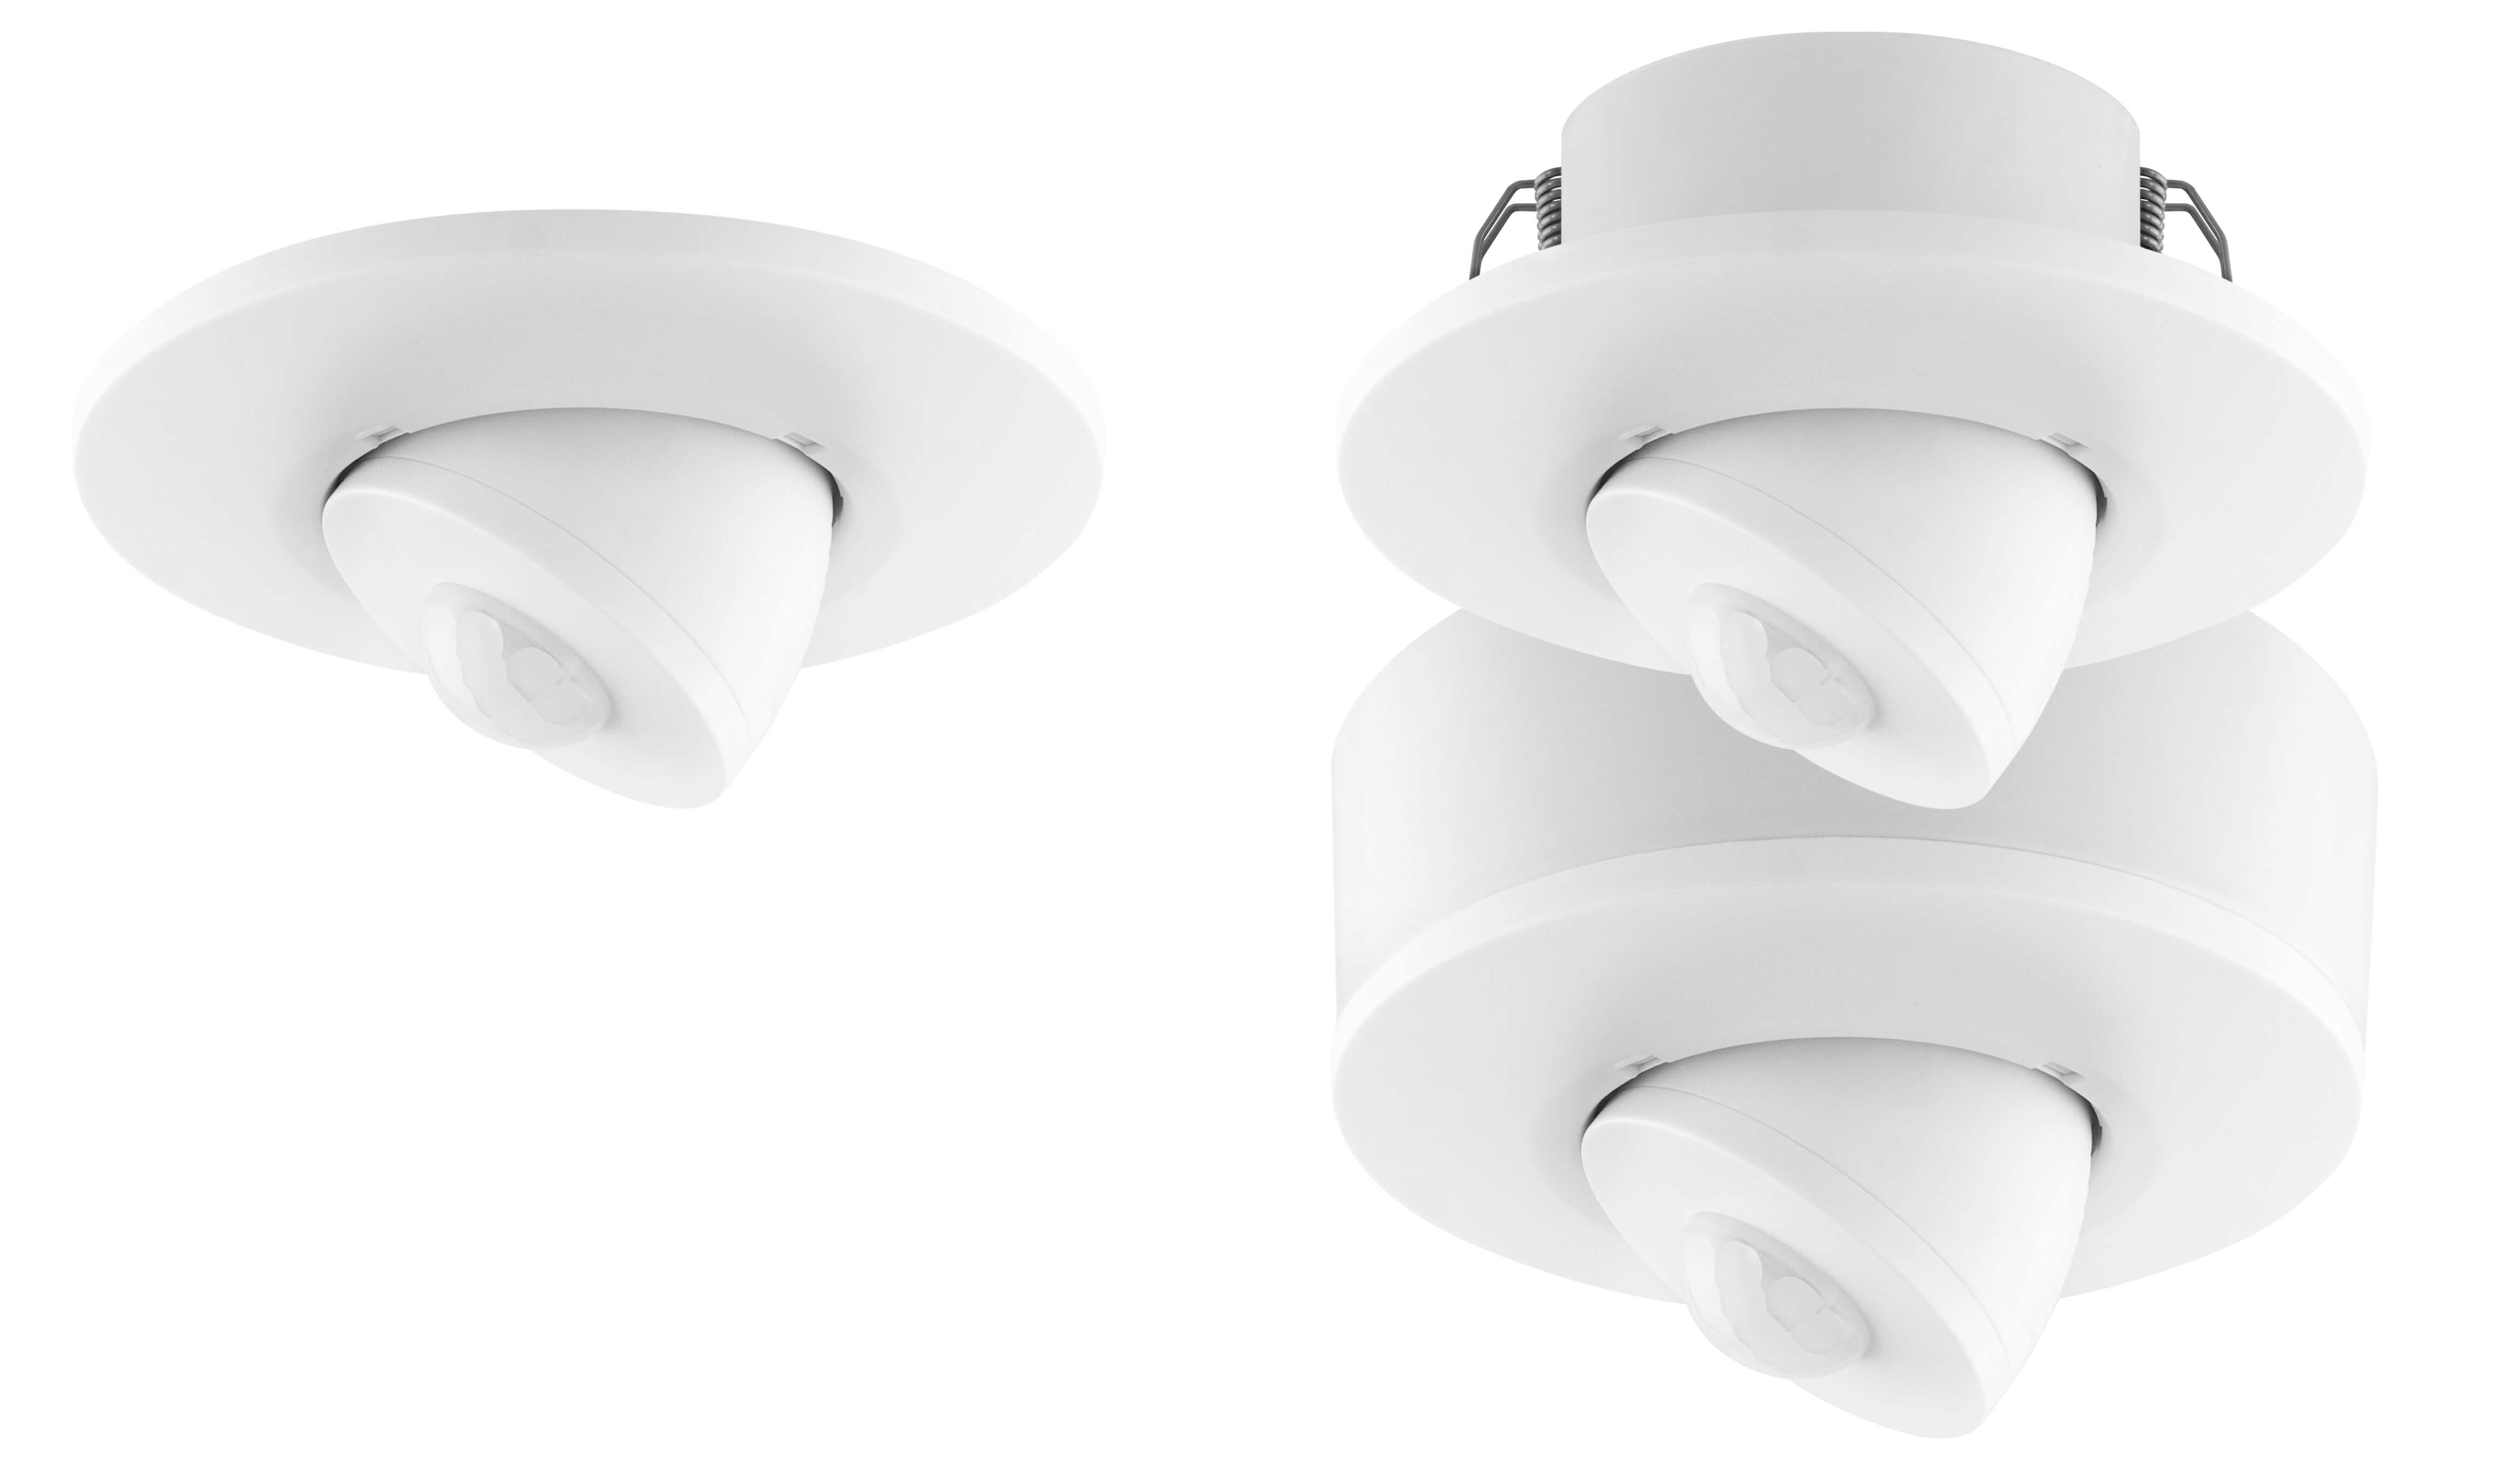
Art.Nr.:86458621-ZD DALI CS ceiling
-> go to product page
DALI CS Sensor: 8 x movement and light sensor
4x work space
1x meeting table
3x for corridor
1x
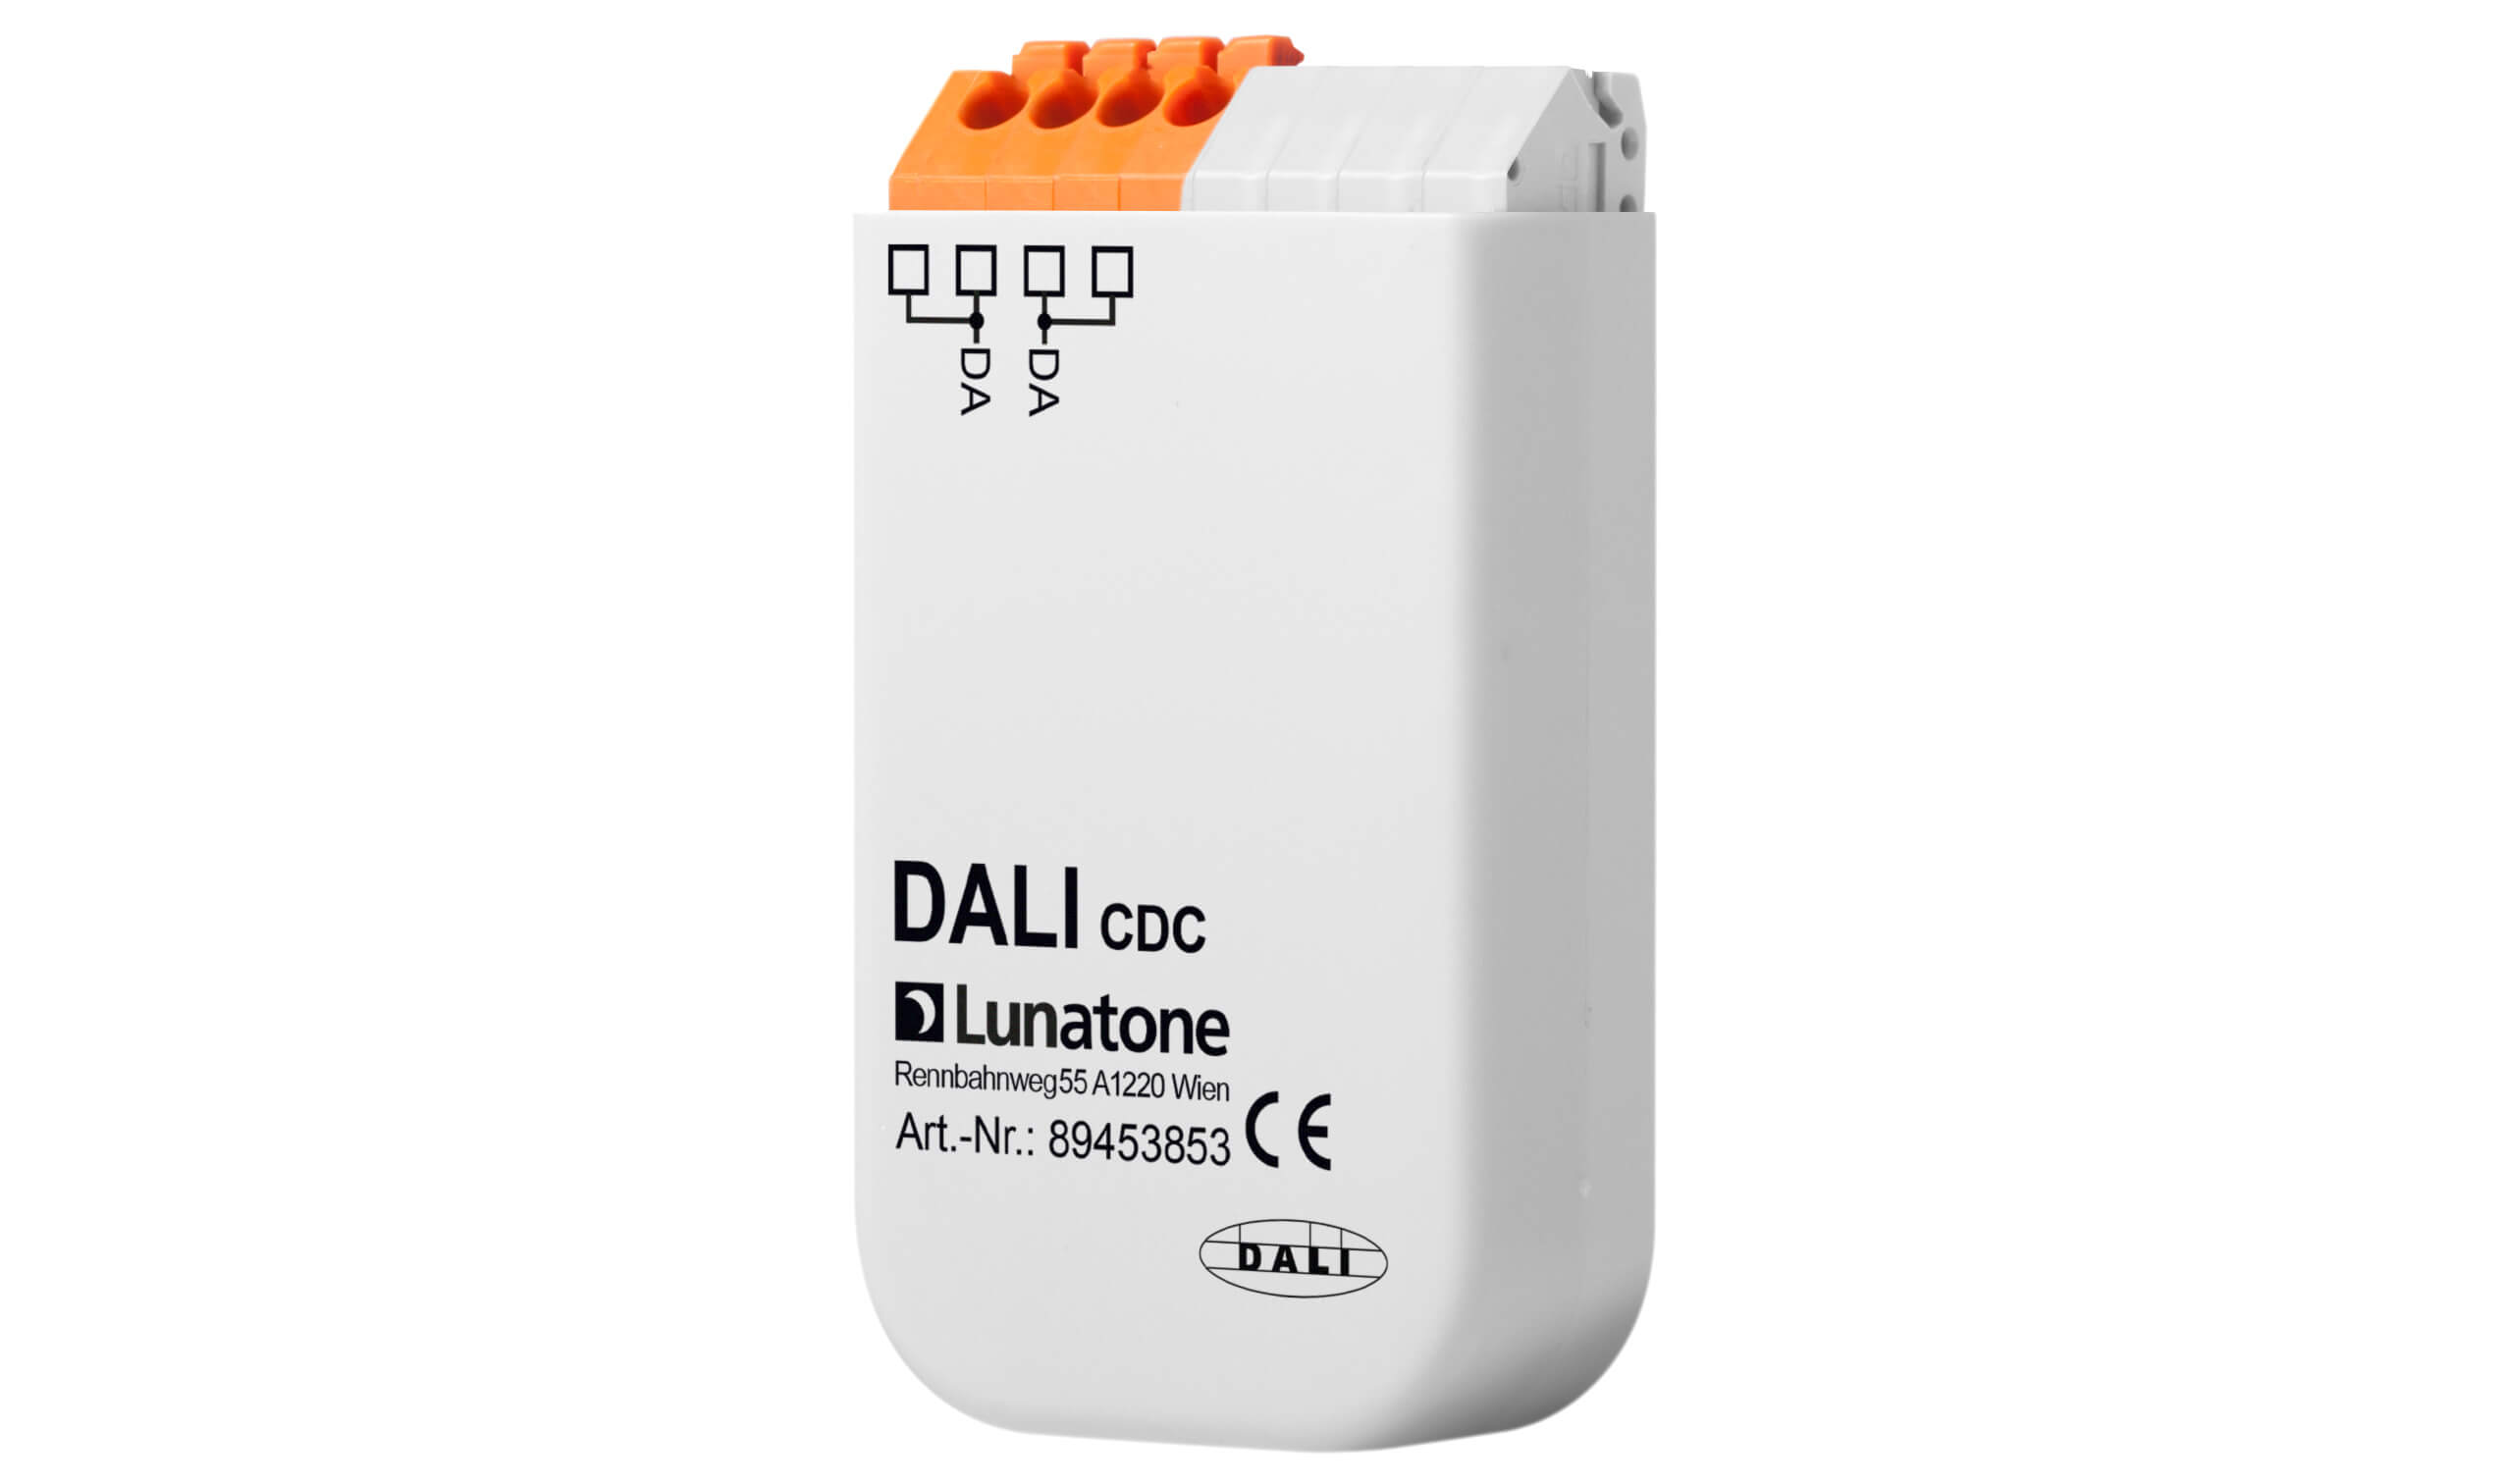
Art.Nr.:89453853 DALI CDC
-> go to product page
Required for setup and configuration
Setup and configuration with DALI Cockpit Software
Step 1: General
Step 2: DALI Touchpanel
Button 1:
Destination address: Group 5
Function: BF6
Cmd X (ON Cmd): RECALL MAX
Cmd Y (OFF Cmd): OFF
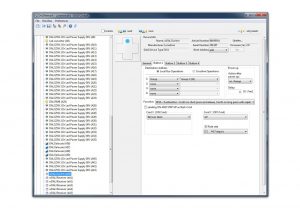
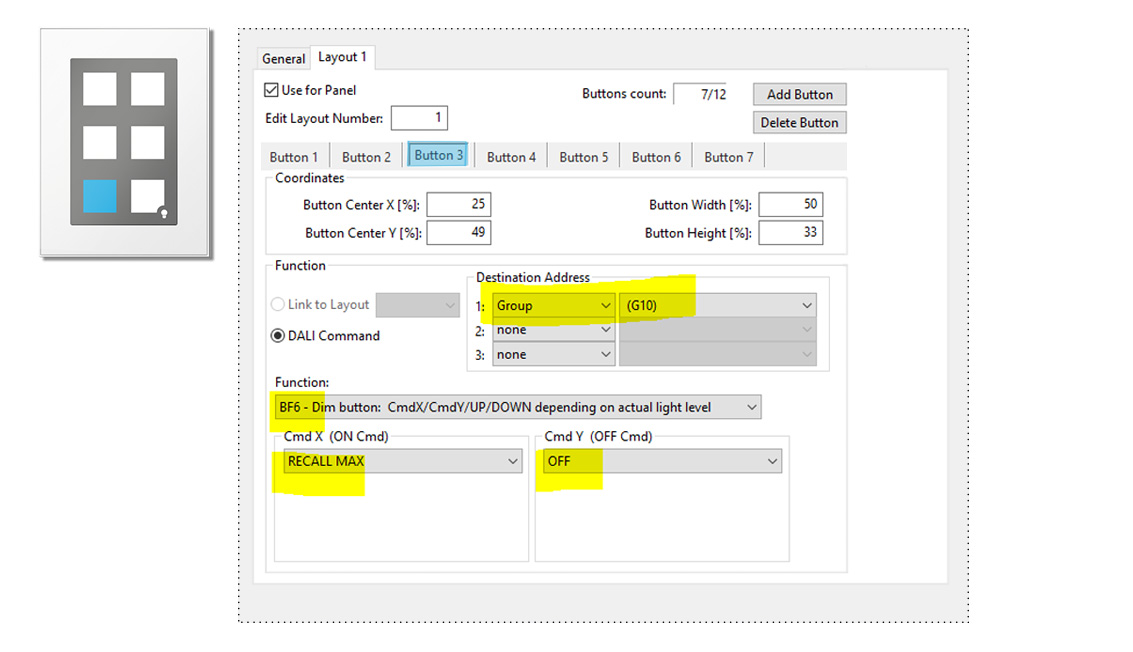
Button 3 (image):
Destination address: DALI group 10 (sum of Group 1 – 4)
Function: BF6 – Dim button: (…)
Cmd X (ON Cmd): RECALL MAX
Cmd Y (OFF Cmd): OFF
Button 5:
Destination address: Group 6
Function: BF6
Cmd X (ON Cmd): RECALL MAX
Cmd Y (OFF Cmd): OFF
Button 2:
Destination address: broadcast
Function: BF4 (toggle X/Y)
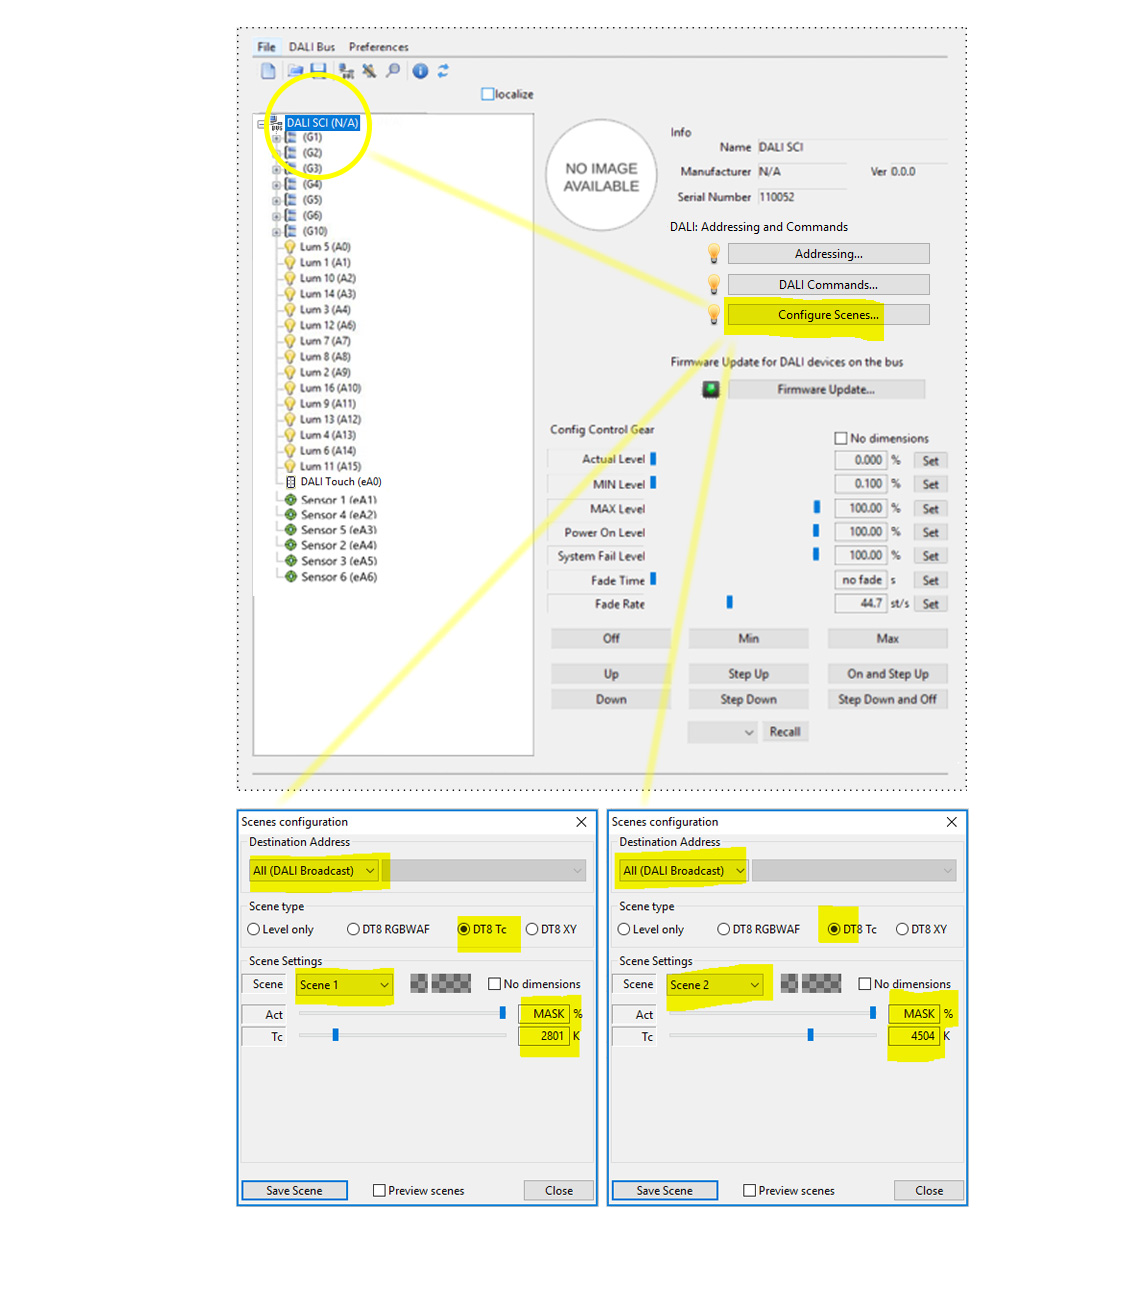
Cmd X (ON Cmd): goto scene 1
Cmd Y (OFF Cmd): goto scene 2
Button 4:
Destination address: broadcast
Function: BF1 (cmd X)
Cmd X (ON Cmd): goto scene 3
Button 6:
Destination address: broadcast
Function: BF1
Cmd X (ON Cmd): OFF
Define Scenes:
Step 3: DALI CS
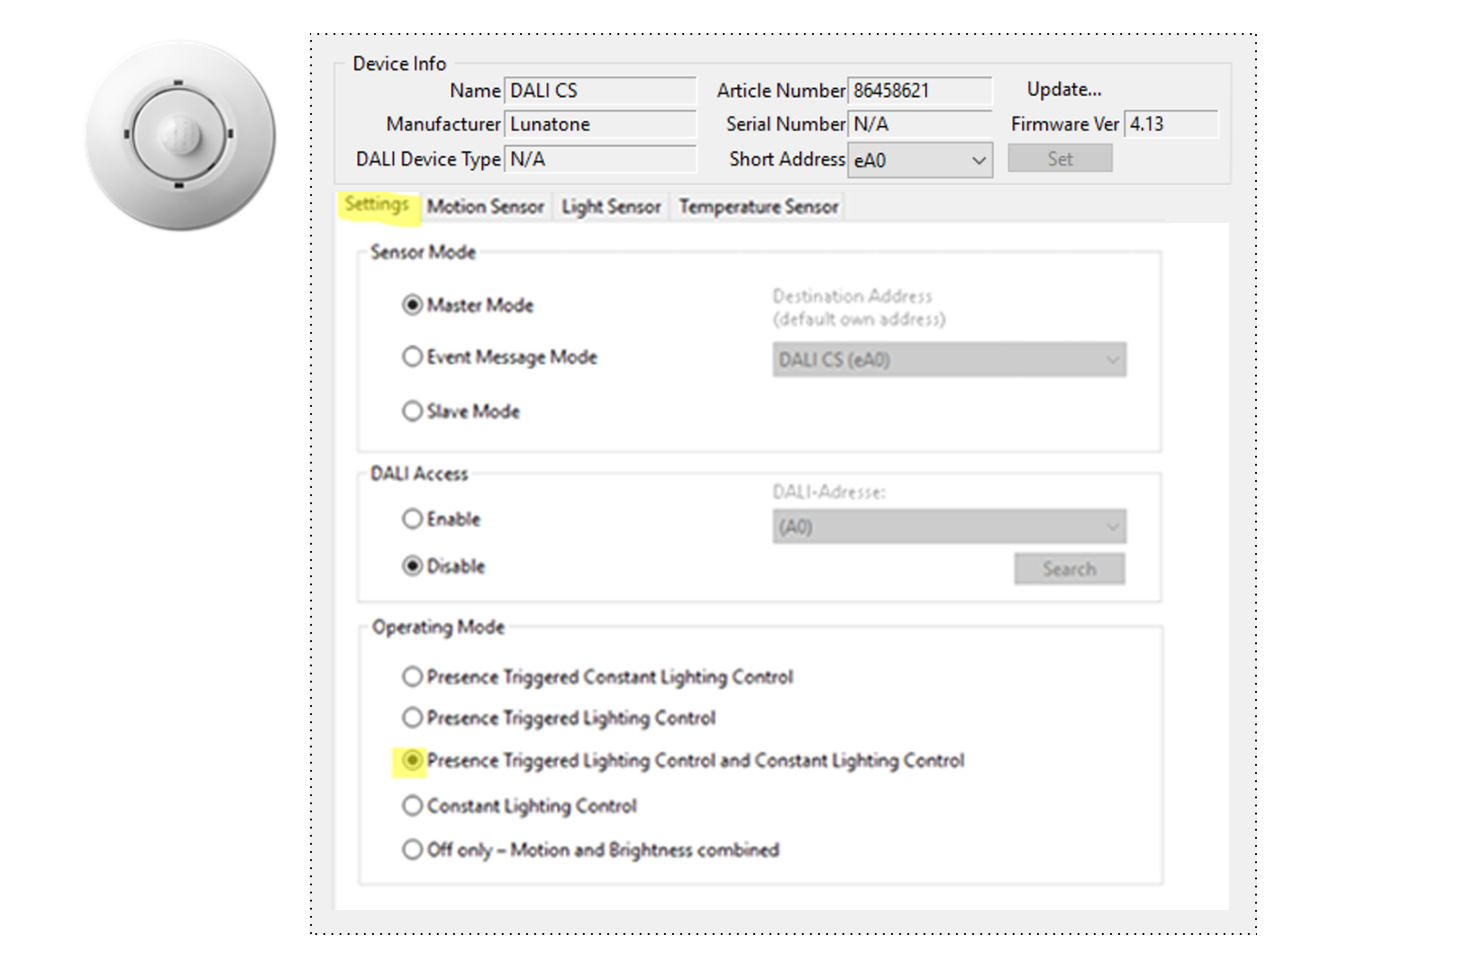
Tab “Settings”
applicable for sensor 1 to 8
in the section “Operating Mode” select: “Presence Triggered Lighting Control and Constant Lighting Control”
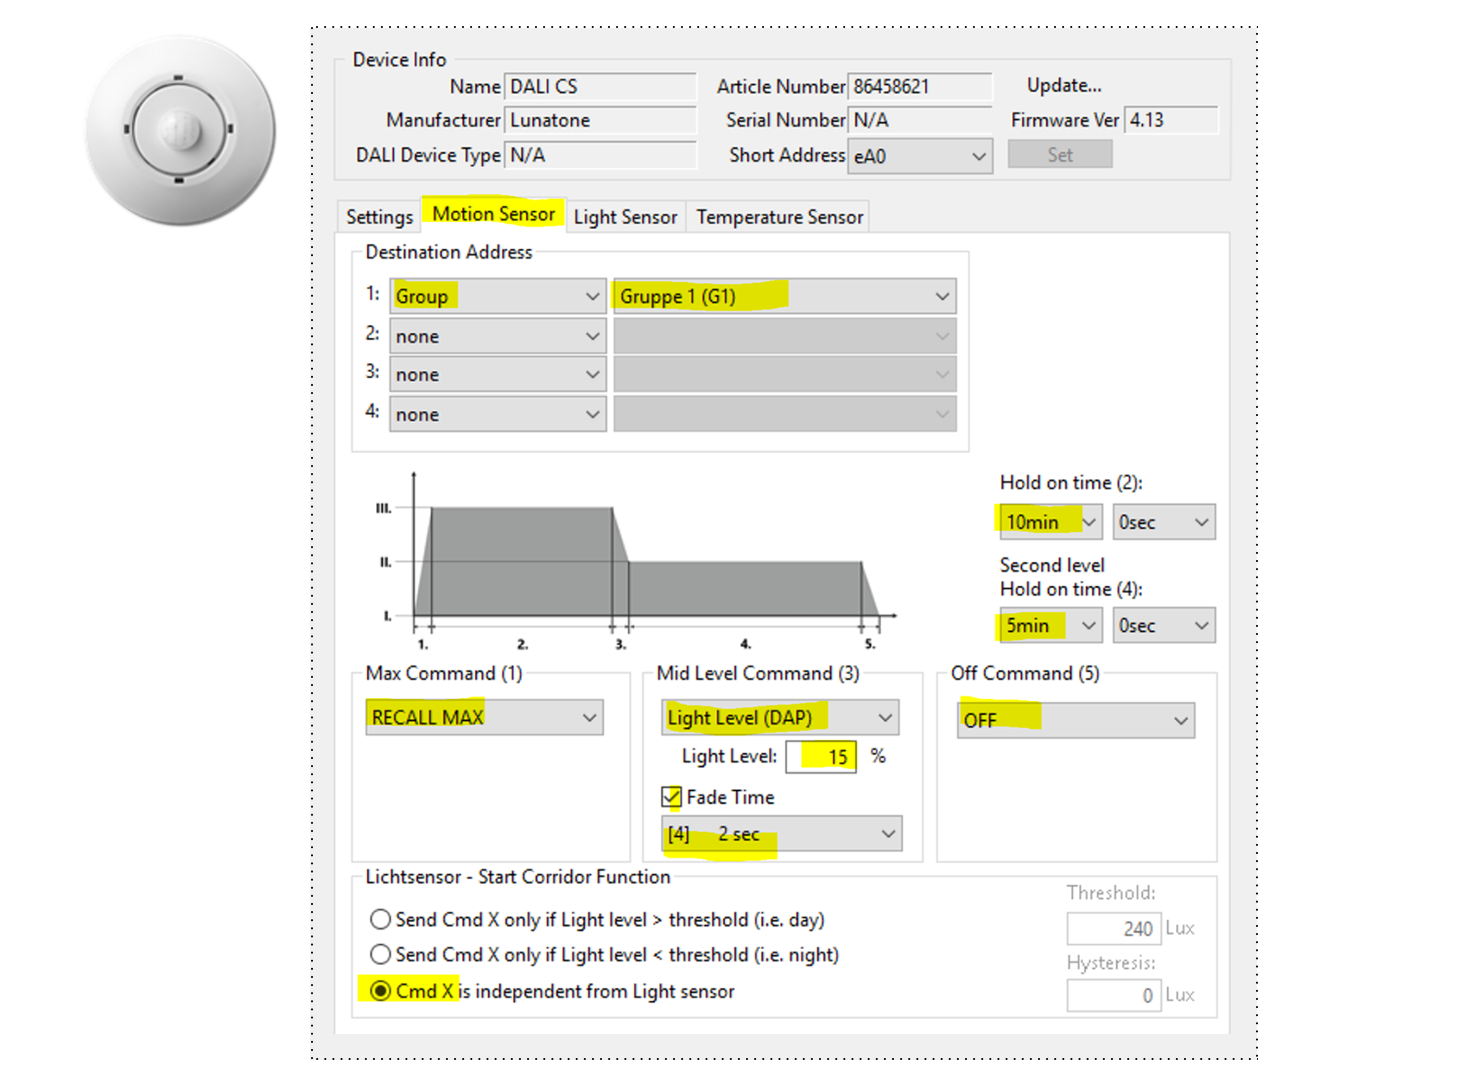
Tab “Motion Sensor”
Destination Address varies for each sensor (see below)
the following settings are the same for all Sensors:
- Max Command (1): RECALL MAX
- Mid Level Command (3): Light Level (DAP)
- Light Level: 15%
- Fade Time: [4] 2 sec
- Off Command (5): OFF
- Hold on time (2): 10min
- Second level Hold on time (4): 5 min
- Lichtsensor – Start Corridor Function: select: “Cmd X is independent from Light sensor “
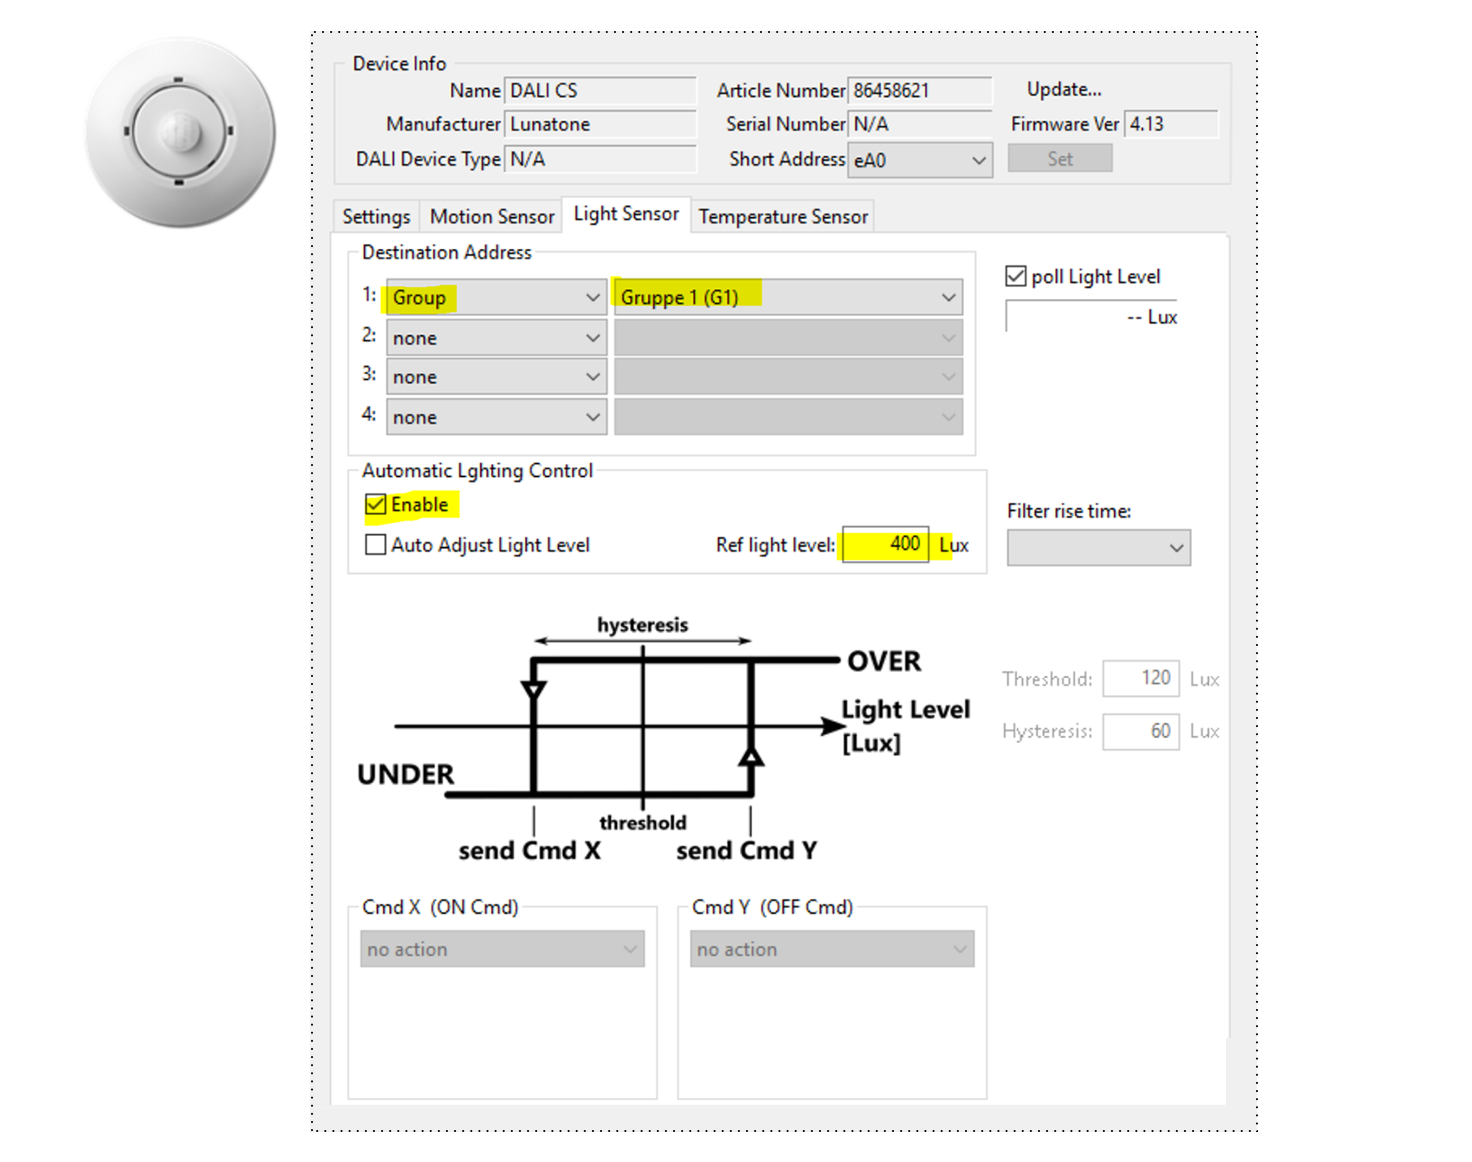
Tab “Light Sensor”
Destination Address varies for each sensor (see below)
the following settings are the same for all Sensors:
- Automatic Lighting Control:
Enable
Ref light level: 400 Lux (reference light level should be adapted and checked on site)
Destination Addresses for Tab “Light Sensor” and “Motion Sensor”:
Sensor 1 (work space 1): Destination address: Group 1
Sensor 2 (work space 2): Destination address: Group 2
Sensor 3 (work space 3): Destination address: Group 3
Sensor 4 (work space 4): Destination address: Group 4
Sensor 5 (meeting table): Destination address: Group 5
Sensor 6 (corridor): Destination address: Group 6
Sensor 7 (corridor): Destination address: Group 6
Sensor 8 (corridor): Destination address: Group 6
Tab “Temperature Sensor”
not used in this application
Step 4: DALI CDC (Circadian Daylight Controller)
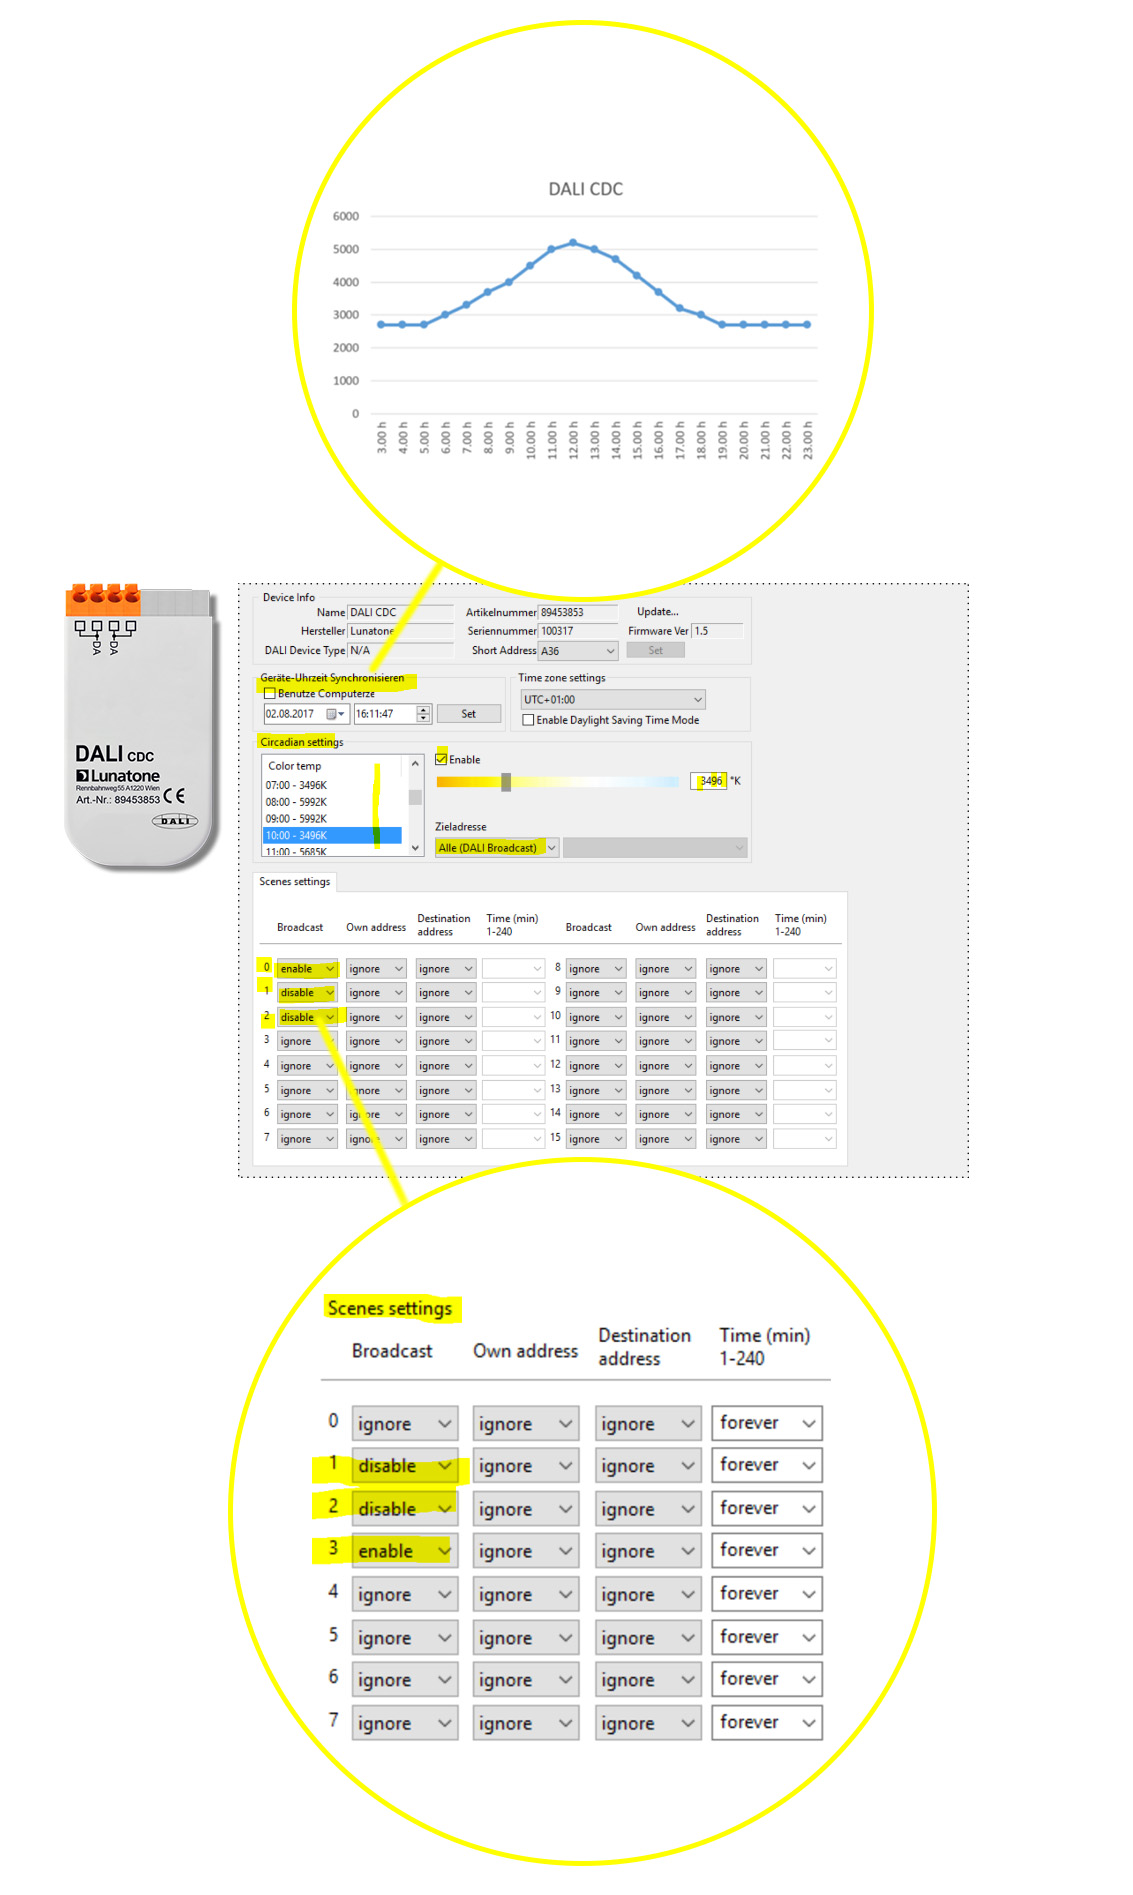 The CDC is a timer module and continuously and smoothly changes the colour temperature according to the defined curve.
Note: As a feature of DALI DT8 drivers the dim level and colour temperature can be set independent and individually -> colour temperature can be changed even if the driver is switched off.
Setting curve:
0:00 3500K
1:00 3500K
2:00 3500K
3:00 3500K
4:00 3500K
5:00 3500K
6:00 3500K
7:00 3500K
8:00 6000K
9:00 6000K
10:00 3500K
11:00 3500K
12:00 3500K
13:00 6000K
14:00 6000K
15:00 3500K
16:00 3500K
17:00 ….
Set scene behaviour:
Scene 1:
when the Touchpanels Button 2: “toggle Scene 2800K (/4500K)” is pressed:
Broadcast: disable -> stops CDC
Own address: ignore (not used here)
Destination address: ignore (not used here)
Time:
Forever: stops until scene 0 (enable / start) is called
E.g. 120: stops for 120 min and then continuous CDC
Scene 2:
when the Touchpanels Button 2: “toggle Scene (2800K/) 4500K” is pressed:
Broadcast: disable -> stops CDC
Own address: ignore (not used here)
Destination address: ignore (not used here)
Time:
Forever: stops until scene 0 (enable / start) is called
E.g. 120: stops for 120 min and then continuous CDC
Scene 3: “automatic”
when the Touchpanels button 4: “circadian automatic” is pressed:
Broadcast: enable CDC
Own address: ignore (not used here)
Destination address: ignore (not used here)
Time: Forever
