basis DALI Installation – 3 Gruppen
Projektumfang
- Büro mit bis zu 10 Leuchten und 3 Gruppen
- Sensor für Bewegung / Anwesenheit
Jeder Arbeitsplatz wird individuell geregelt
Beleuchtung schaltet ein, wenn Bewegung / Anwesenheit erkannt wird, und erlischt nach 10-minütiger Abwesenheit - Sensor für Konstantlichtkontrolle (Energieeinsparung)
Lichtsteuerung abhängig von der Helligkeit in einem Raum - Manuelle Steuerung (Schalter)
on / off
dimmen (Konstantlichtkontrolle wird abgeschaltet, Sensor für Bewegung / Anwesenheit bleibt aktiv)
Inhalt
- Planung der DALI Installation
- Notwendige DALI Geräte
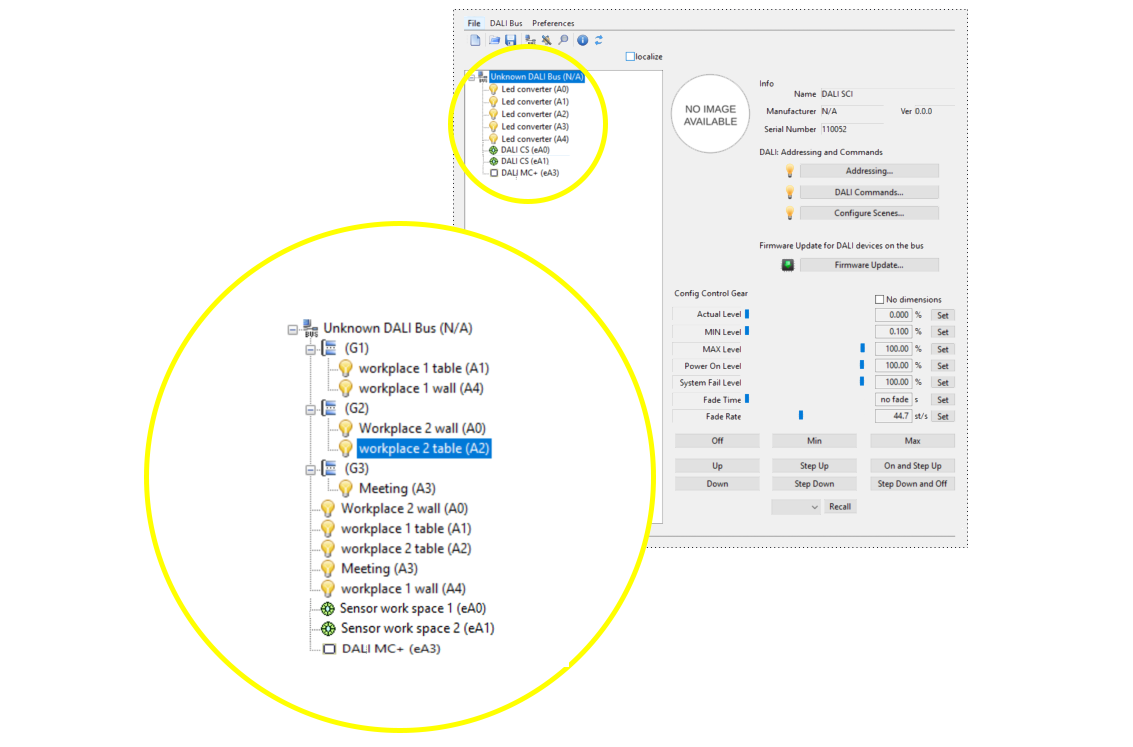
- Inbetriebnahme und Konfiguration mit DALI Cockpit Software
Planung der DALI Installation
Ausgangspunkt
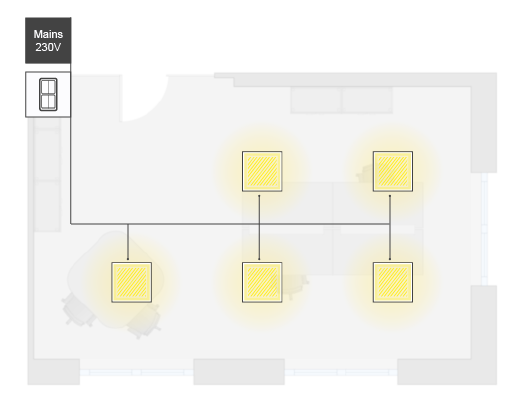
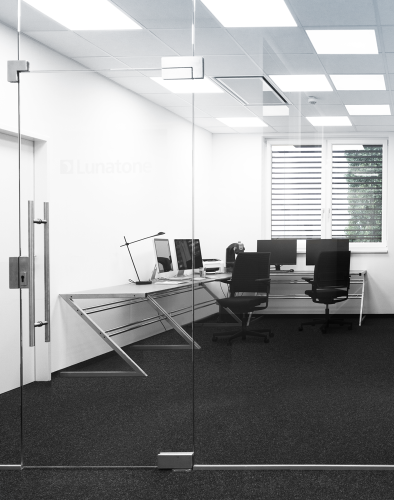
- Büro mit 2 Arbeitsplätzen und kleinem Besprechungstisch
- 5+ Leuchten
- manuelle Steuerung (Lichtschalter am Eingang)
DALI Lichtmanagement
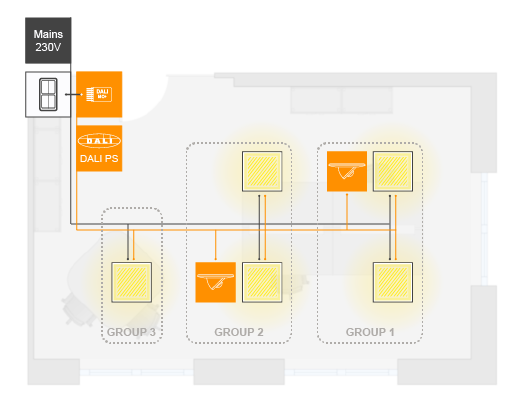
- Einteilung in 3 Gruppen (2 Arbeitsplätze, 1 Besprechungstisch)
- Bewegungs- / Anwesenheitssensor für jeden Arbeitsplatz, sowie Konstantlichtkontrolle
- integration des konventionellen Lichtschalters in das DALI System (DALI Power Supply und DALI MC +)
Notwendige DALI Geräte


1x
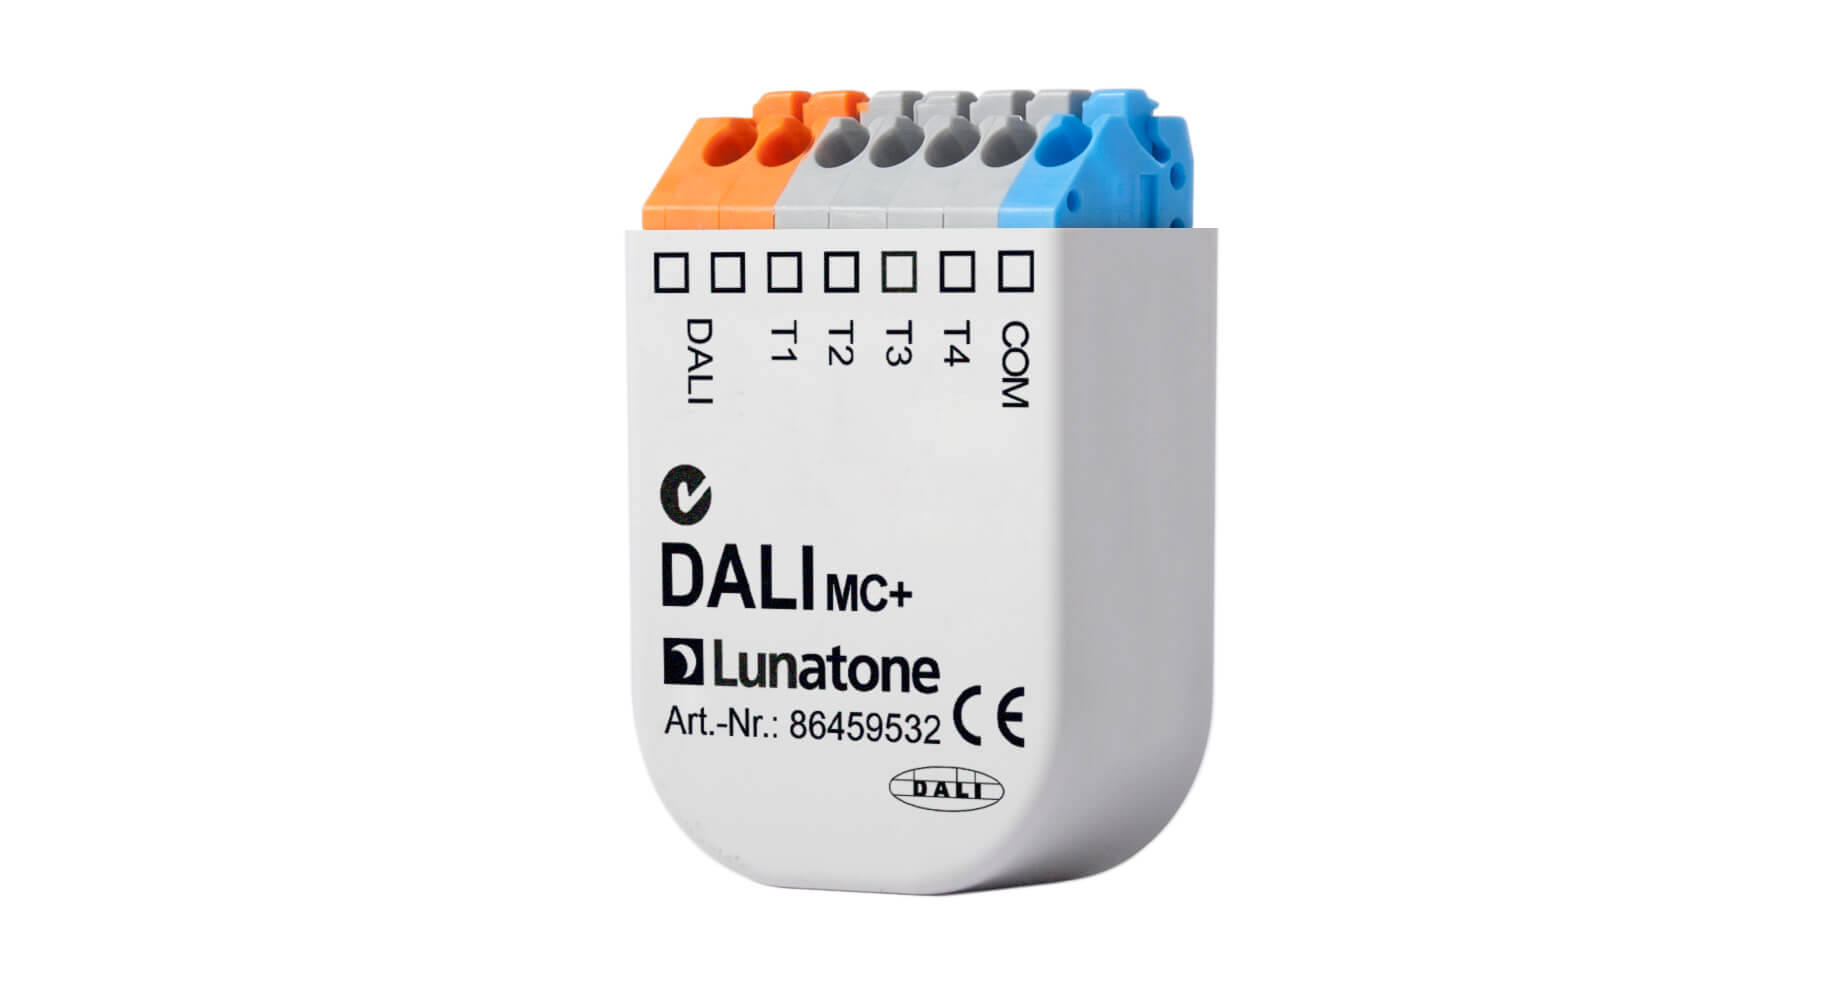
Art.Nr.:86459532 DALI MC+
-> Produktseite
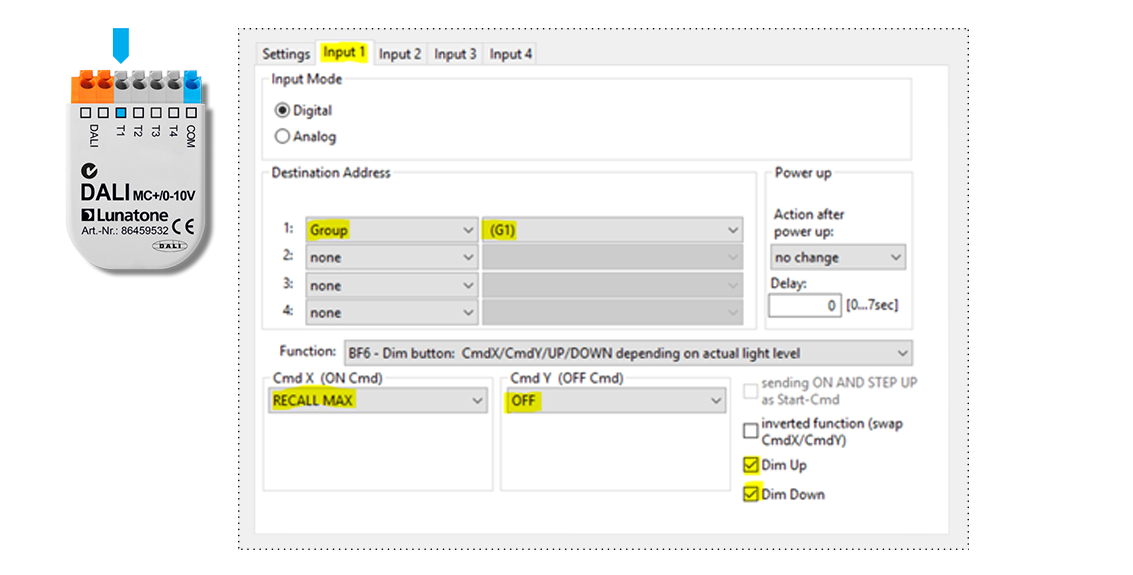
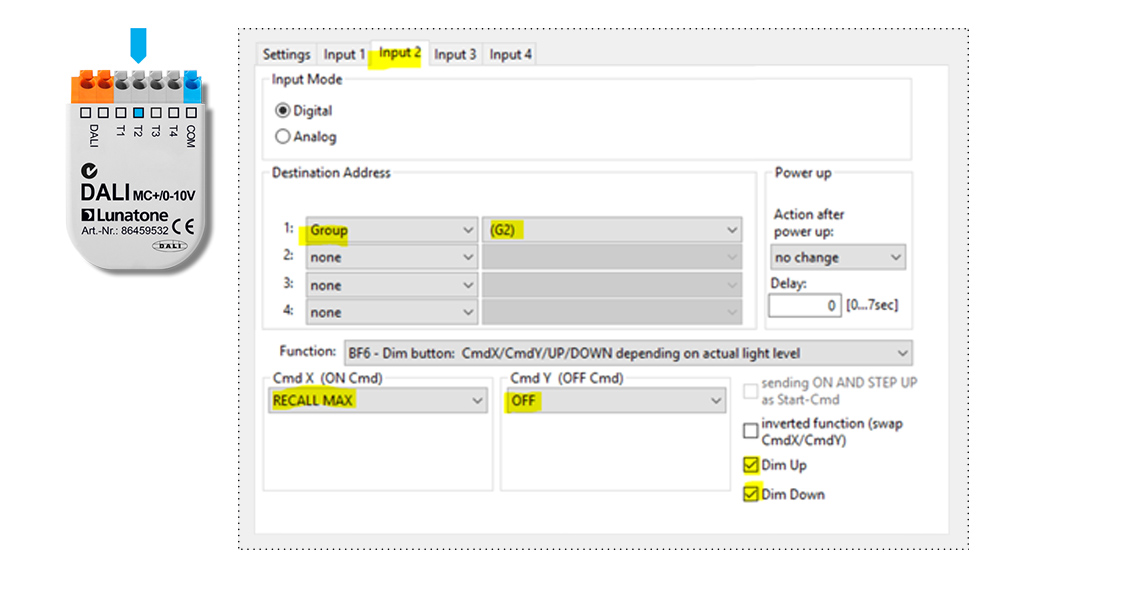
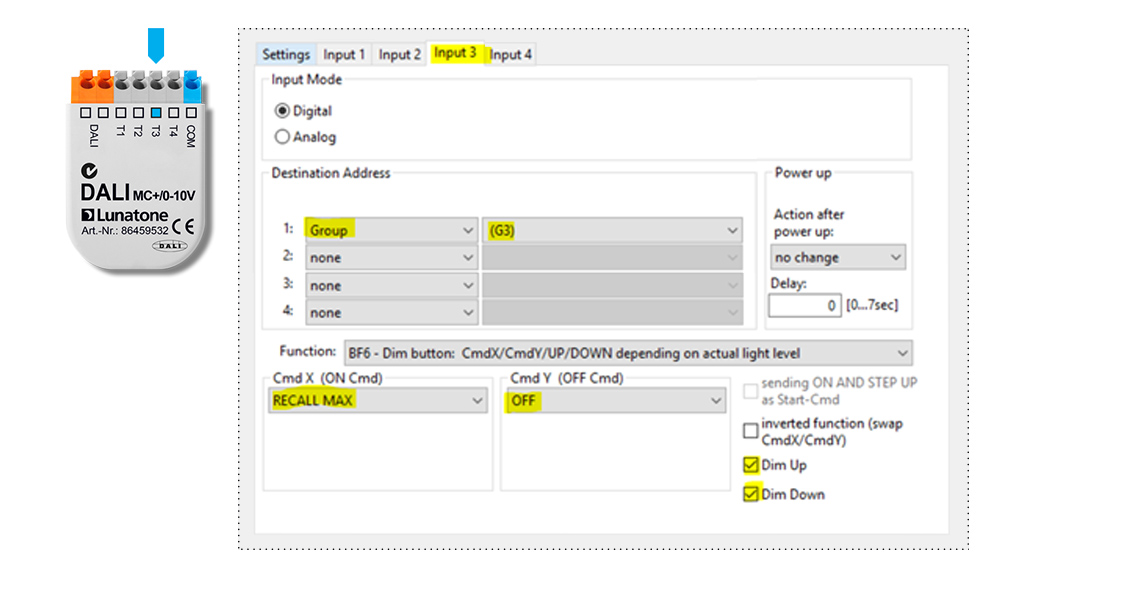
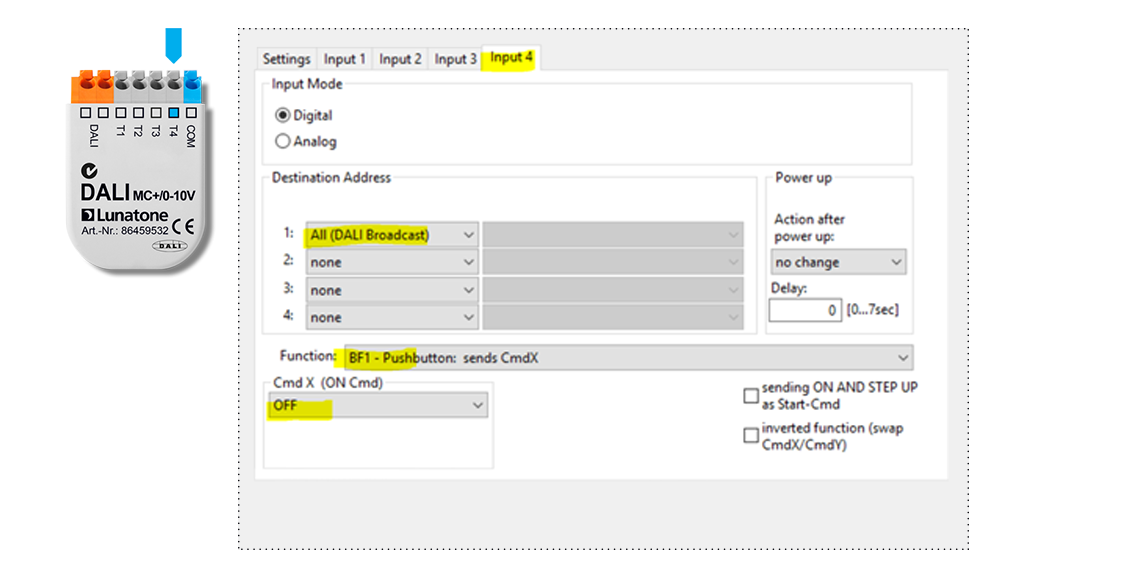
DALI MC+: Tasterkoppler
Taste 1: switch on/off dim up Arbeitsplatz 1
Taste 2: switch on/off dim up Arbeitsplatz 2
Taste 3: switch on/off dim up Besprechungstisch
Taste 4: all off
1x
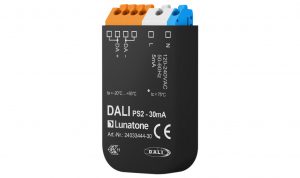
Art.Nr.:24033444-30 DALI PS 30mA
-> Produktseite
DALI Busversorgung mit 30mA (bis zu 10 Leuchten + Steuerung)
in Unterputzdose installiert mit DALI MC+
2x
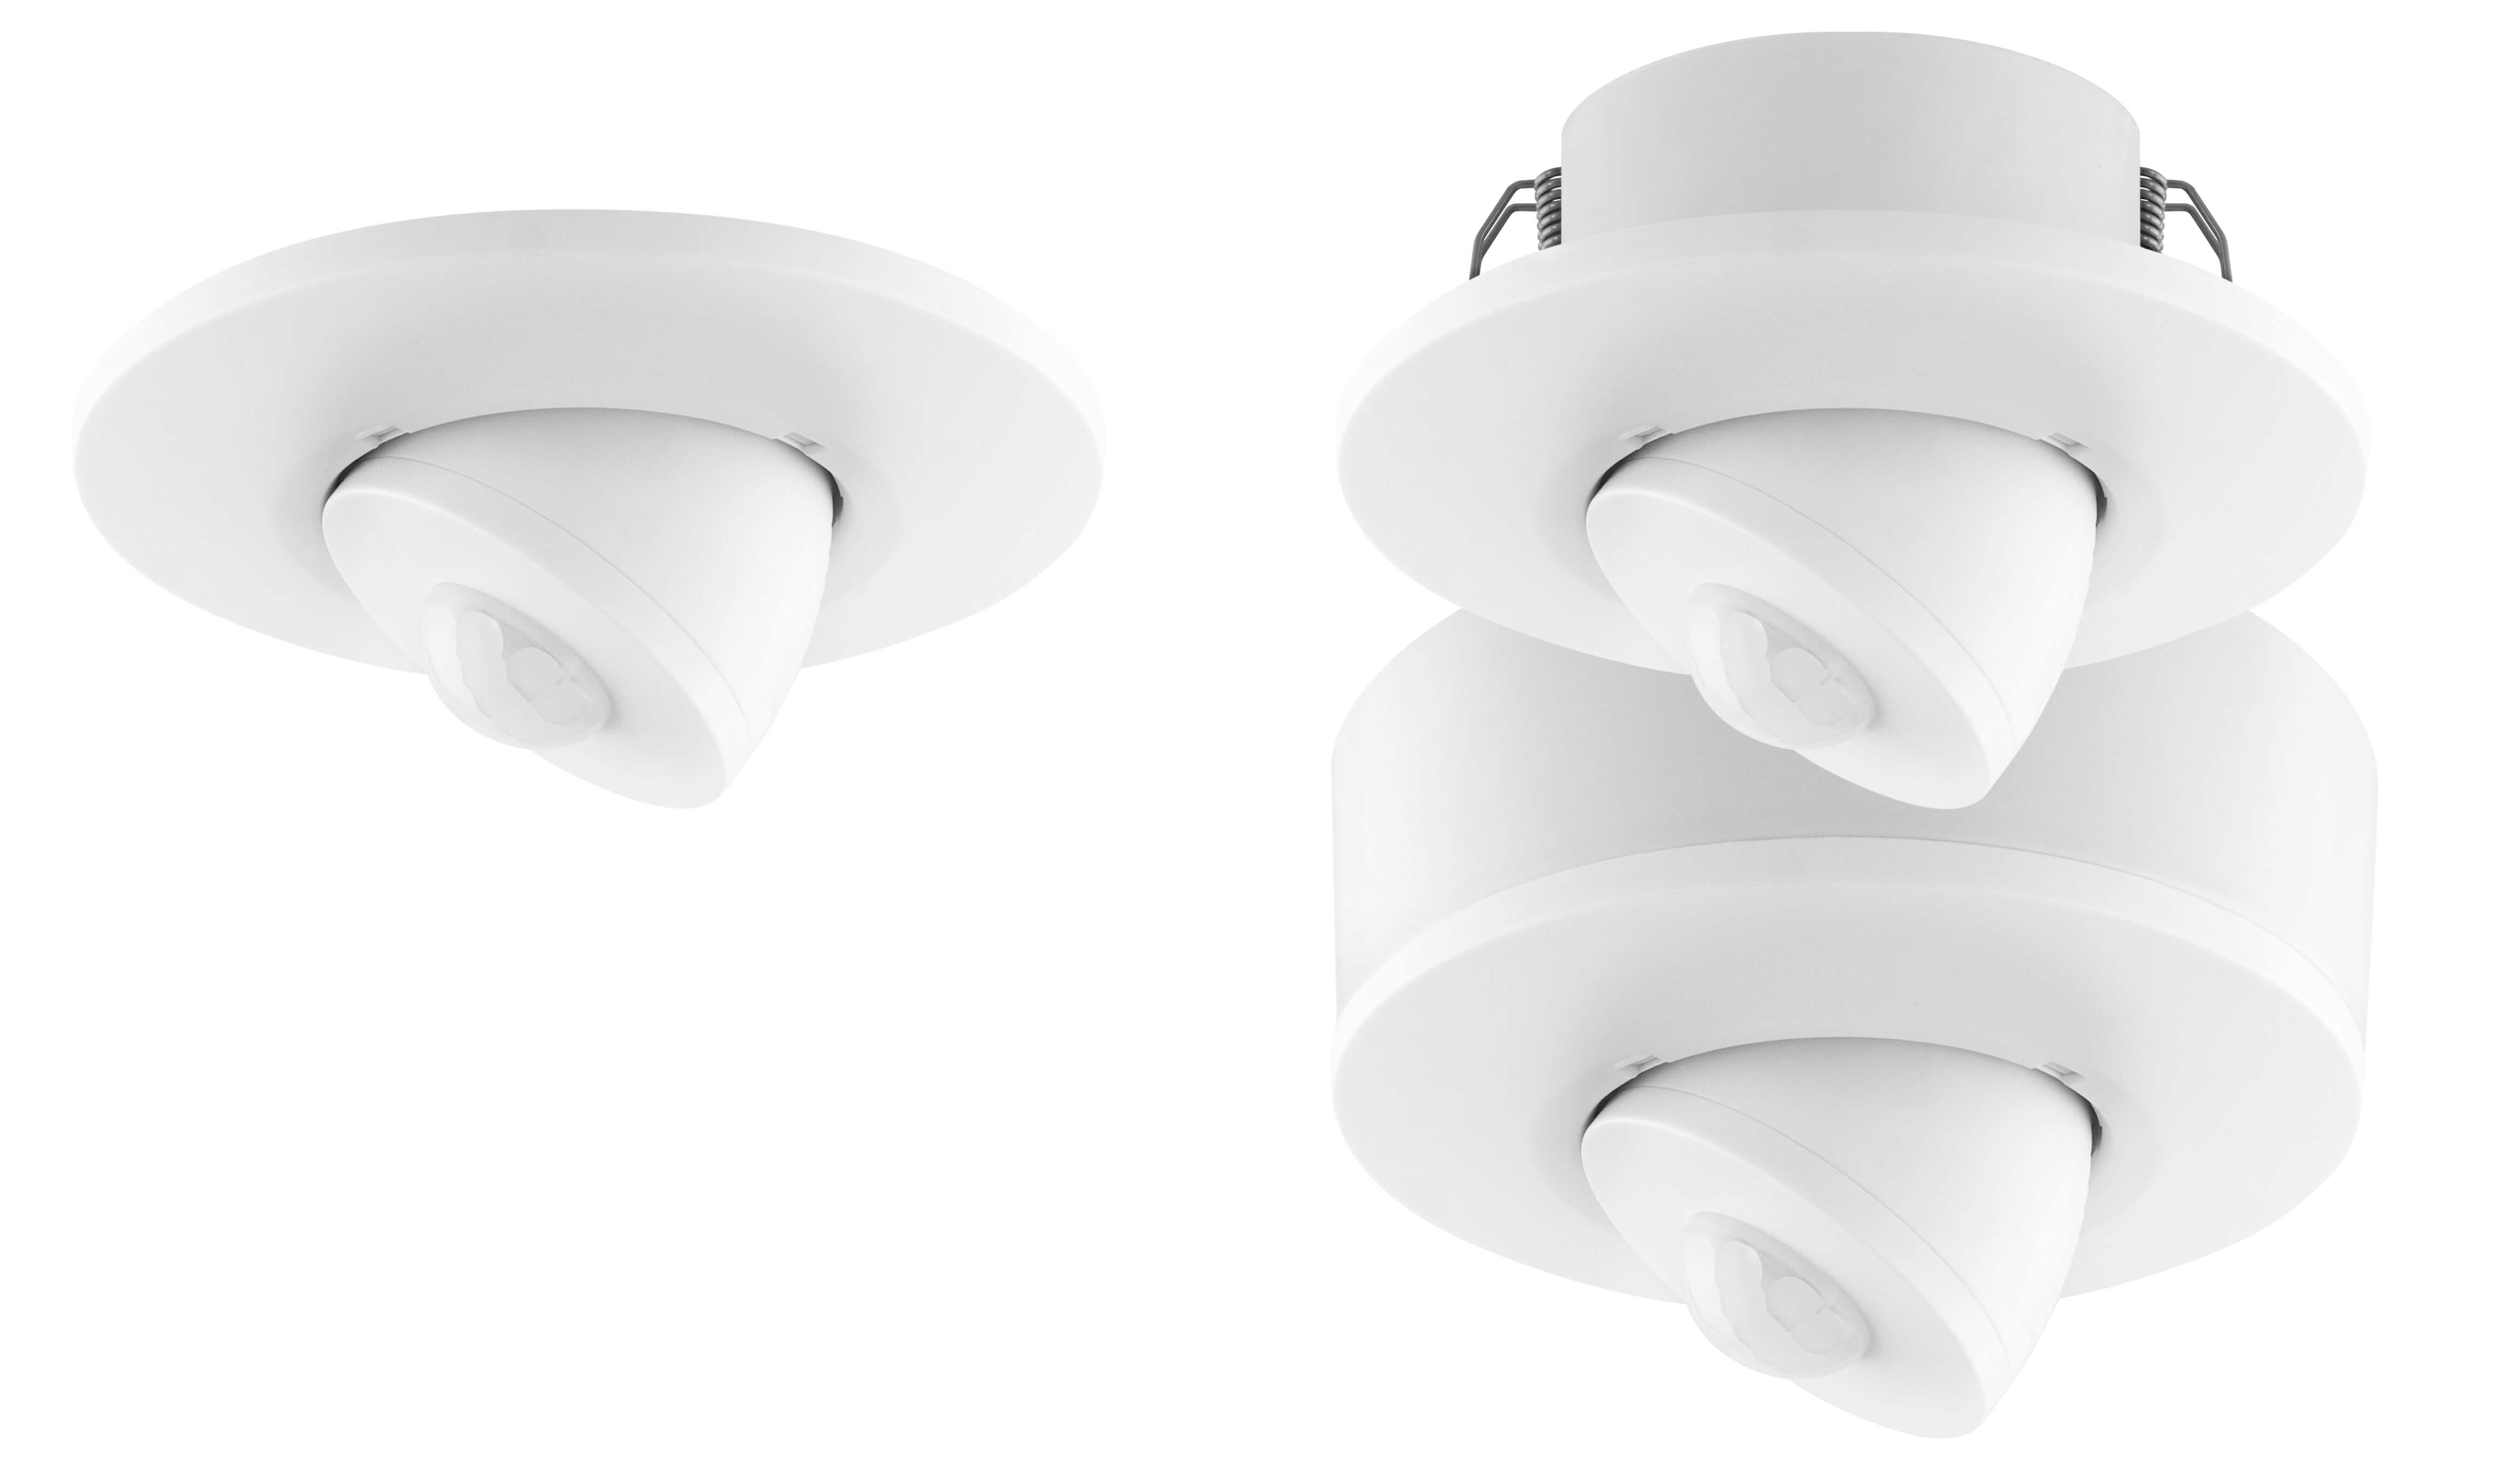
Art.Nr.:86458621-ZD DALI CS ceiling
-> Produktseite
DALI CS Sensor: Sensormodul für Bewegungsmeldung und Lichtintensitätsmessung
Notwendig für Inbetriebnahme und Konfiguration
Inbetriebnahme und Konfiguration mit DALI Cockpit Software
Schritt 1: Allgemein
Schritt 2: DALI MC+
Konfiguration von T1 bis T4 -> Input 1 bis Input 4 in DALI Cockpit
Schritt 3: DALI CS
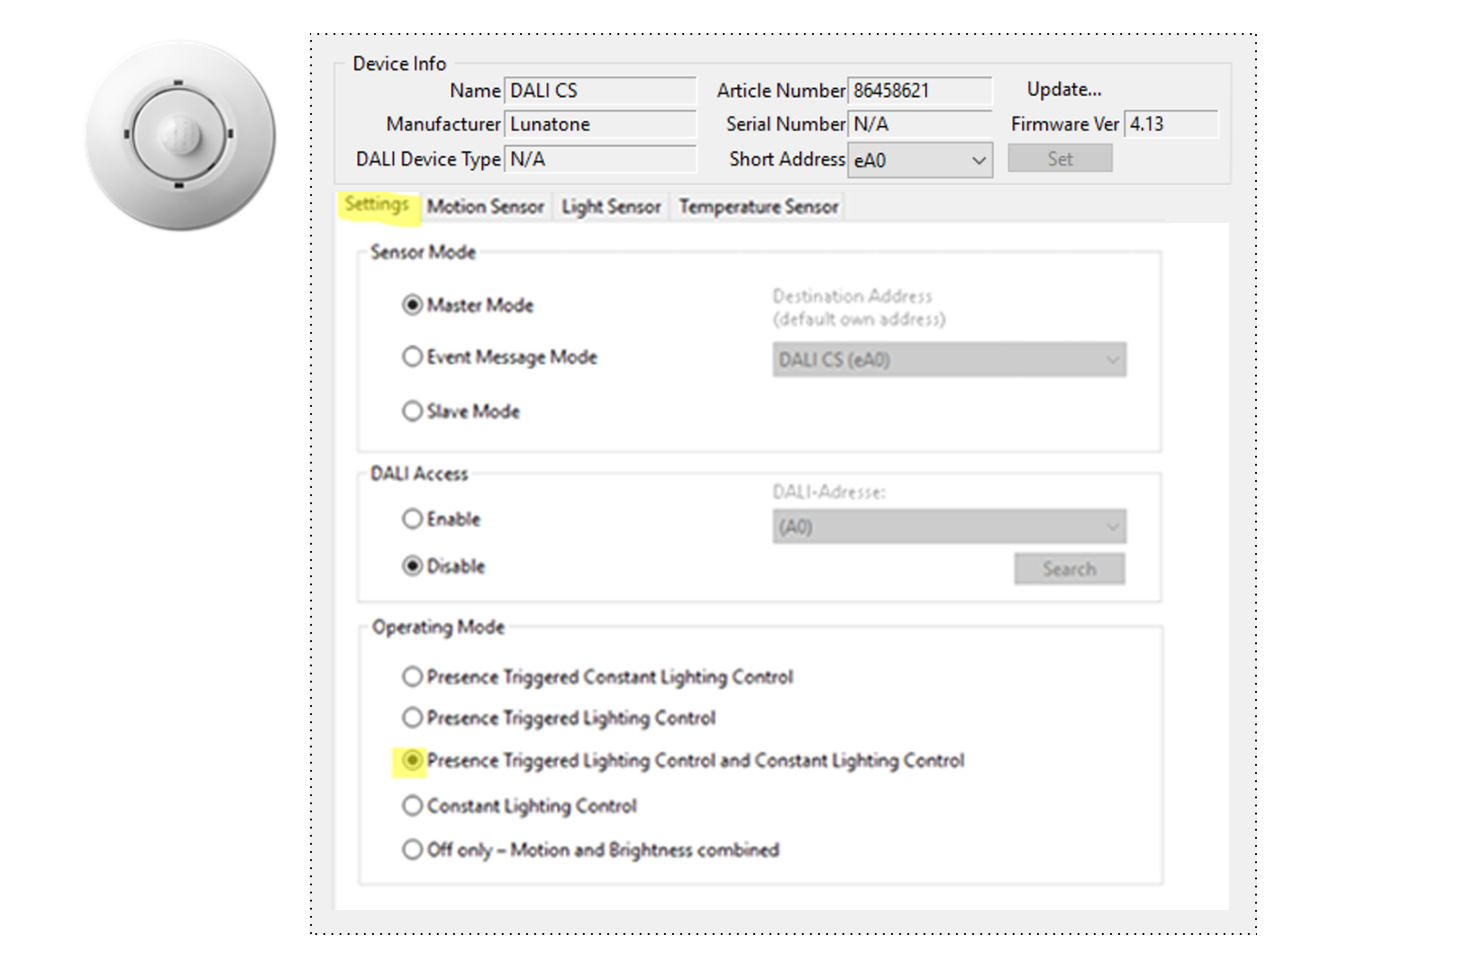
Reiter “Settings”
(betrifft Sensor 1 und 2)
- im Bereich “Operating Mode” wählen Sie: “Presence Triggered Lighting Control and Constant Lighting Control”
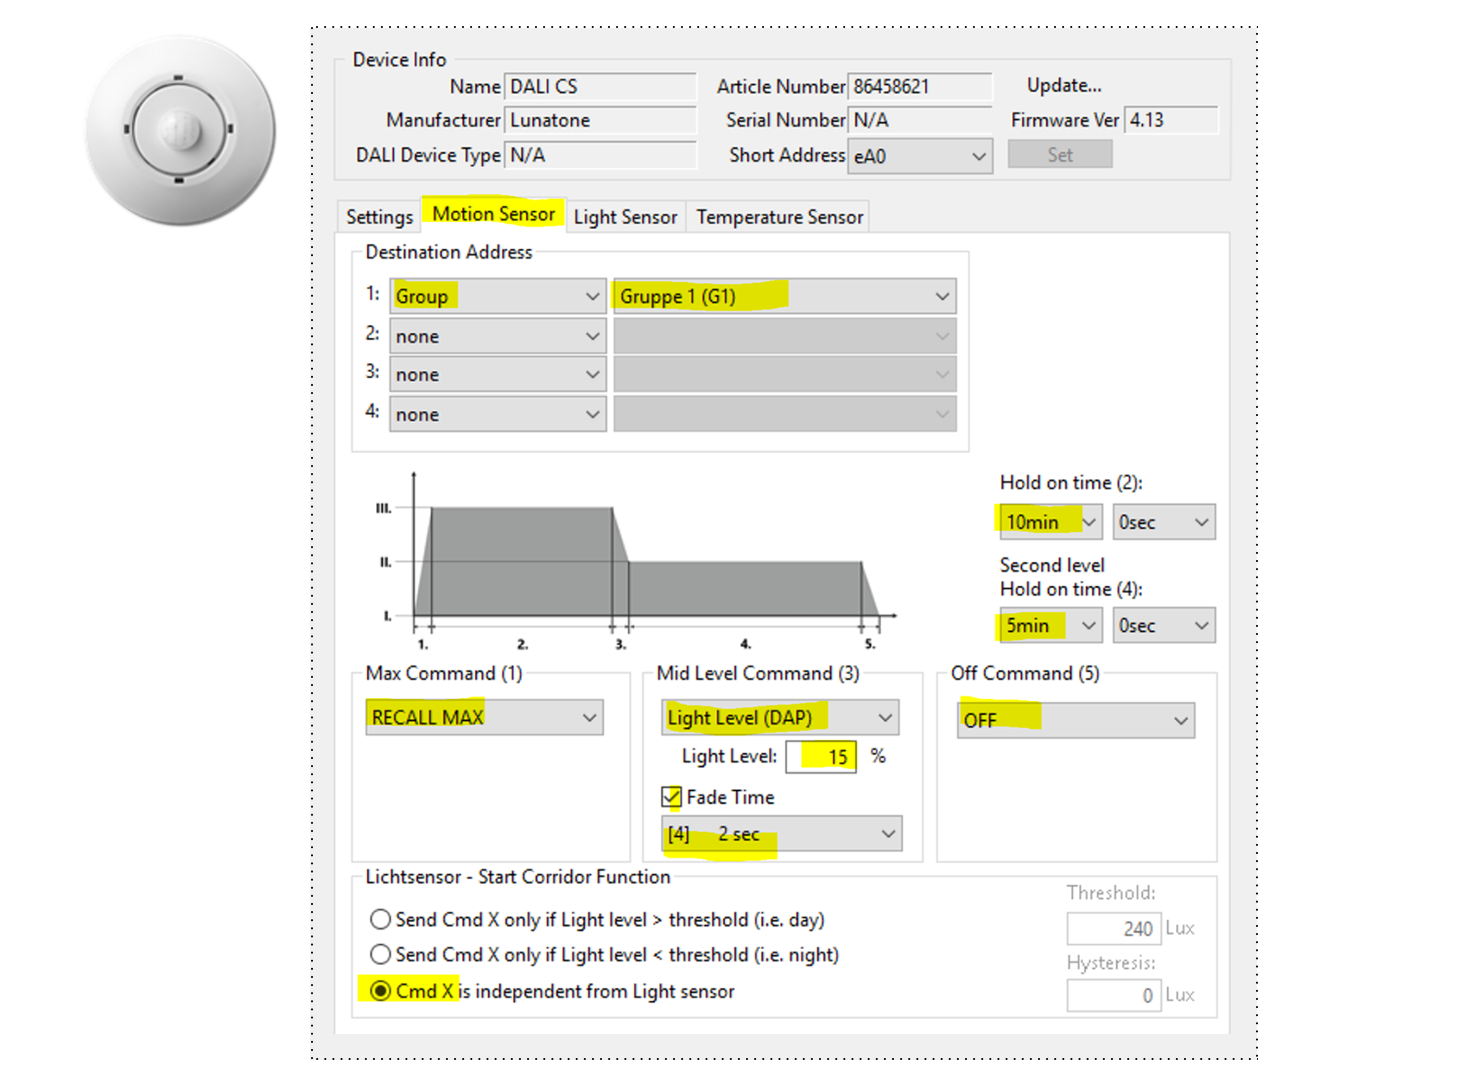
Reiter “Motion Sensor”
Einstellungen für Sensor 1:
- Destination Address: Group 1 (G1)
- Max Command (1): RECALL MAX
- Mid Level Command (3): Light Level (DAP)
Light Level: 15%
Fade Time: [4] 2 sec - Off Command (5): OFF
- Hold on time (2): 10min
- Second level Hold on time (4): 5 min
- Lichtsensor – Start Corridor Function: select: “Cmd X is independent from Light sensor “
Einstellungen für Sensor 2:
- Destination Address: Group 2 (G2)
- Max Command (1): RECALL MAX
- Mid Level Command (3): Light Level (DAP)
Light Level: 15%
Fade Time: [4] 2 sec - Off Command (5): OFF
- Hold on time (2): 10min
- Second level Hold on time (4): 5 min
- Lichtsensor – Start Corridor Function: select: “Cmd X is independent from Light sensor “
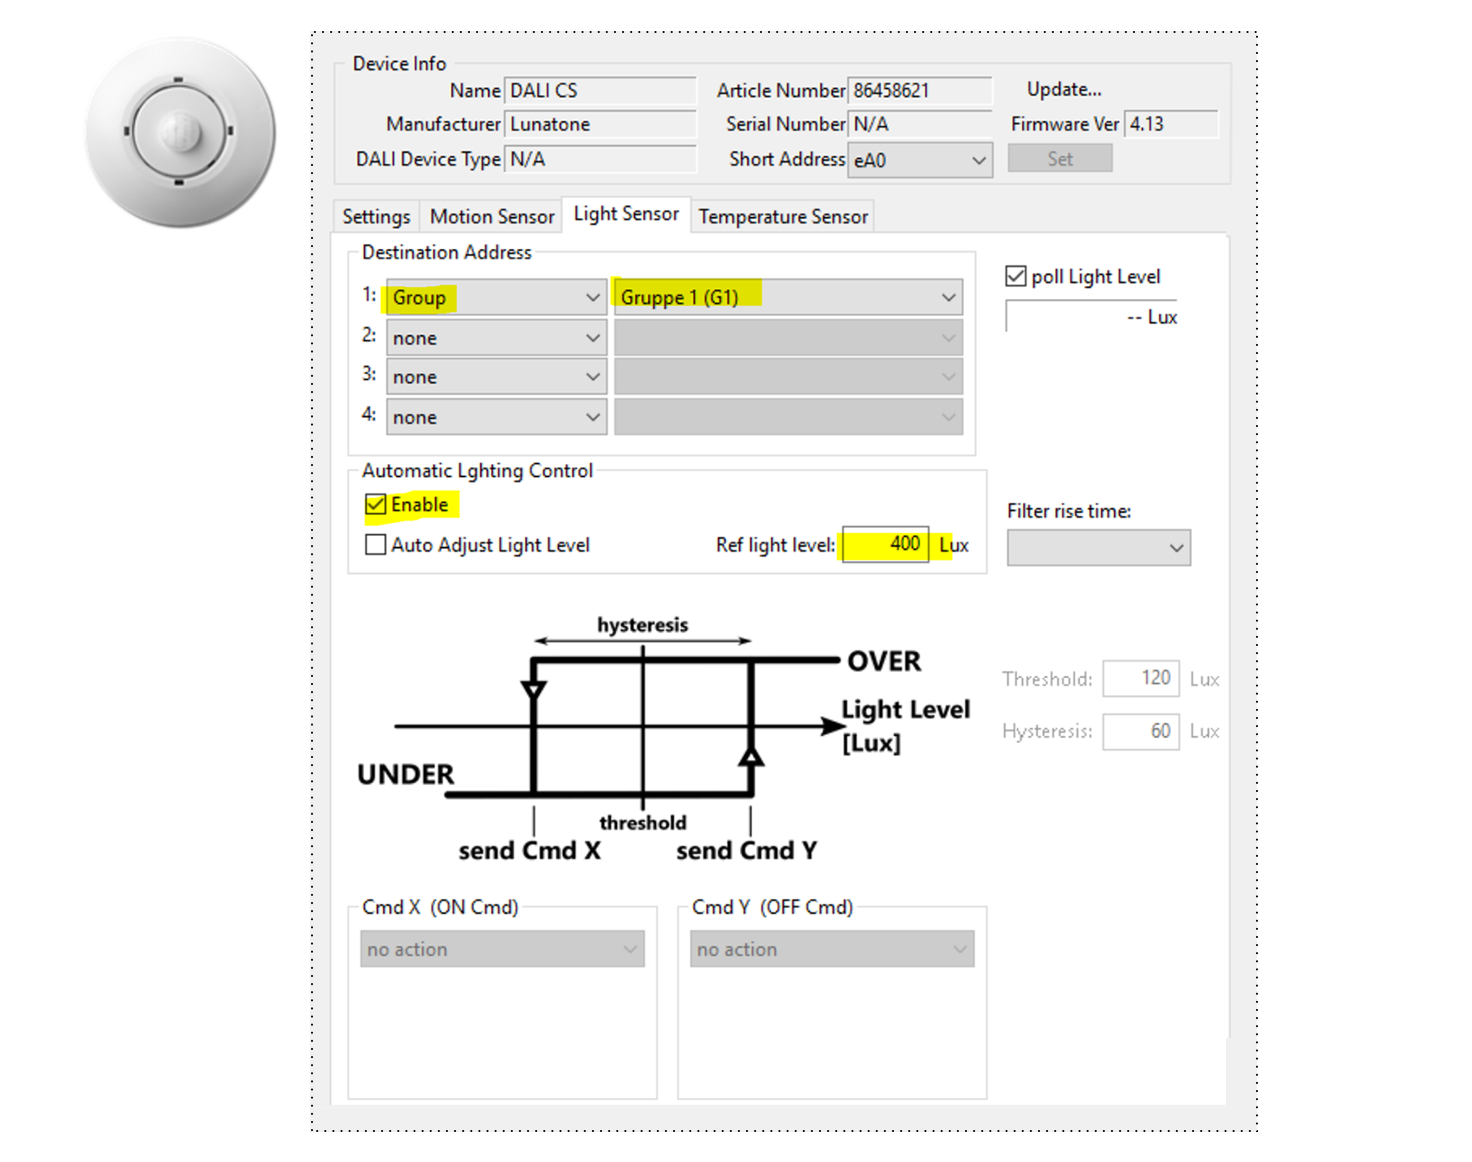
Reiter “Light Sensor”
Einstellungen für Sensor 1:
- Destination Address: Group 1 (G1)
- Automatic Lighting Control:
Enable
Ref light level: 400 Lux (Referenzlichtpegel sollte vor Ort angepasst und überprüft werden)
Reiter “Temperature Sensor”
nicht Teil dieser Anwendung
Einstellungen für Sensor 2:
- Destination Address: Group 2 (G2)
- Automatic Lighting Control:
Enable
Ref light level: 400 Lux (Referenzlichtpegel sollte vor Ort angepasst und überprüft werden)
